
With Viva-MTS Virtual PBX (Armenia), your phone numbers become multi-line: you can set up automatic routing of incoming calls to an available employee, replace standard ring tones with a unique voice greeting, store the history of all calls and their recordings, and much more. The Altegio integration with Viva-MTS Virtual PBX makes your communication with clients even more convenient.
To learn more about Viva-MTS Virtual PBX, visit https://pbx.mts.am/.
Benefits of the Altegio integration with Viva-MTS Virtual PBX #
- Add new clients quickly and without mistakes. When a new client calls, you can immediately add their phone number to the database, enter the client’s first and last name, and create an appointment in the calendar.
- Increase loyalty of existing clients. Thanks to the pop-up card, you can address the client by name right away, create a new appointment, or edit/cancel a previously scheduled visit. You save both your time and the client’s time, since you no longer need to search for the client card manually.
- Keep call history at hand. If needed, listen to call recordings directly in the Altegio interface.
Steps to set up the integration #
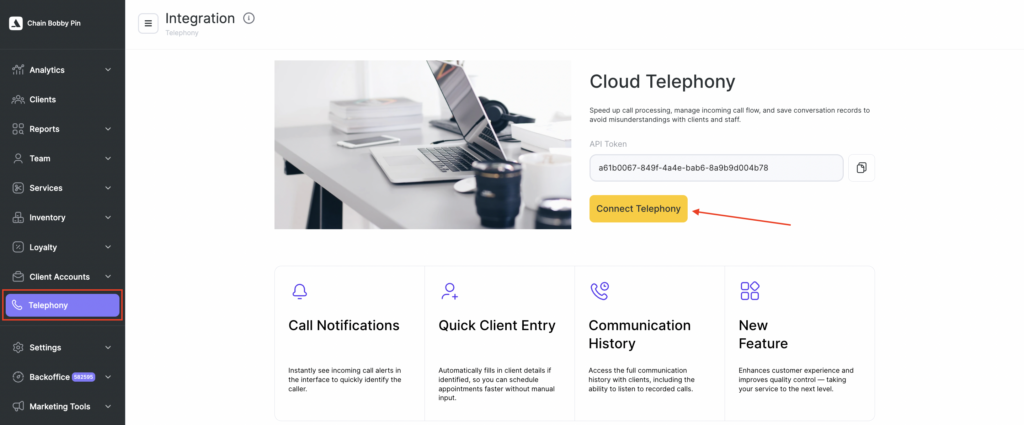
- Log in to your Altegio personal account. In the left menu, find the Telephony section. Copy the value from the Token field.
- Open a new tab in your browser and log in to Viva-MTS Virtual PBX. Go to Settings, then CRM Integration. Click the Altegio widget.
- Paste the token you copied earlier and click Connect. The integration setup in the Virtual PBX is complete.
- Return to the Altegio interface. You will see that the integration status is now Connected, and in the sidebar under Telephony the following sections are available: Integration, Routing, Routes, and Calls.
- Go to Routes. When the integration is created, Route for all users is added automatically. Click the pencil icon in the Actions column and edit the route.
- Give the route a clear name (for example, Administration or Sales department), select the users and locations that should receive calls, and choose where the route call history will be stored. The chain owner/manager can view the full history under Telephony > Calls, but location employees’ access rights will differ. If managers:
- should not have access to call history, choose Chain call history;
- can view lists of all calls received by the company — choose Chain and all locations call history (the entire history is also duplicated under Reports > Call Logs);
- should have access only to their location call history, choose Chain and notified locations call history (under Reports > Call Logs, only calls of the specified location will be shown).
- After setting up the route, don’t forget to click Save.
- Now link the route you created in Altegio to the number that should receive incoming calls. Go to Routing and add a rule.
- At this step, specify in order:
- Routing type: where the call will go — Phone (if calls should come to the company’s main number) or SIP (if calls should be received by a specific employee or department).
- Identifier: the phone number without a plus sign, spaces, or hyphens (if you selected Phone) or the employee/department short extension (if calls go via SIP).
- Route: the route you created earlier.
- If needed, add additional rules. Click Save.
The Altegio integration with Viva-MTS Virtual PBX has been successfully set up. You can now use all its benefits.

