
Altegio updates service terms
Below we’ll explain in detail what exactly is changing and how to prepare.
Under the new terms, the subscription cost will depend not only on the number of service providers but also on the number of employees working with clients.
Changes in Billing #
The key parameter for charging employees who don’t provide services is their ability to create appointments in the journal and process payments. This mainly affects administrators — they will now be billed.
Employee Roles #
Under the new terms, the “User” designation in Altegio will be replaced with the simpler “Employee” and “Role.”
Role — is a set of access permissions an employee at a location or network will have in their account to perform specific actions in the system.
- All employees who provide services will remain billable as before. Their access and role will not incur additional charges. In Altegio, this role is called “Specialist.” However, the new terms introduce limitations to this role. A “Specialist” will only be able to view data and clients assigned specifically to them.
Changes to access rights for the “Specialist” role:
• “Appointment Calendar” section — for the “View staff schedule and bookings” right, only a specific active employee will be listed.
• “Client Database” section — for the “Show clients” right, only a specific active employee will be listed.
• The option “View appointment list” in the “Overview” section will no longer be available.
- The “Administrator” role will now be billed regardless of access rights granted.
- The “Owner” role will remain free for one account per subscription.
Other Changes #
- All roles will be managed under Settings > Staff or Billing > Subscription > Management. The section Settings > User List will be removed.
- A new “Management” page is already available in the “Billing” section, where you can manage paid and free employees by:
• Sending invitations to users without access
• Linking a user with access to a service provider - New details will appear in Billing > Subscription:
• Number of paid employees available under the subscription
• Number of paid employees added to the location
• Number of free employees added to the location - A new “Security” section will appear with data history and two-step authentication
- A visual performance report for administrators will be added
- KPI-based salary calculation schemes for administrators will be introduced
How to Prepare for the Changes #
We recommend reviewing your location and network setup to ensure that “extra” employees and users don’t affect your pricing plan:
- Dismiss employees who no longer work at your company
- Delete inactive users from your location or network
- Review current access rights and roles of active users
- Link users to employees
How to Dismiss Not Needed Employees #
If your location still lists employees who no longer work at the company but haven’t been dismissed in the system, please follow these steps:
Go to Billing > Subscription and click “Manage” in the “Subscription Plan” section.
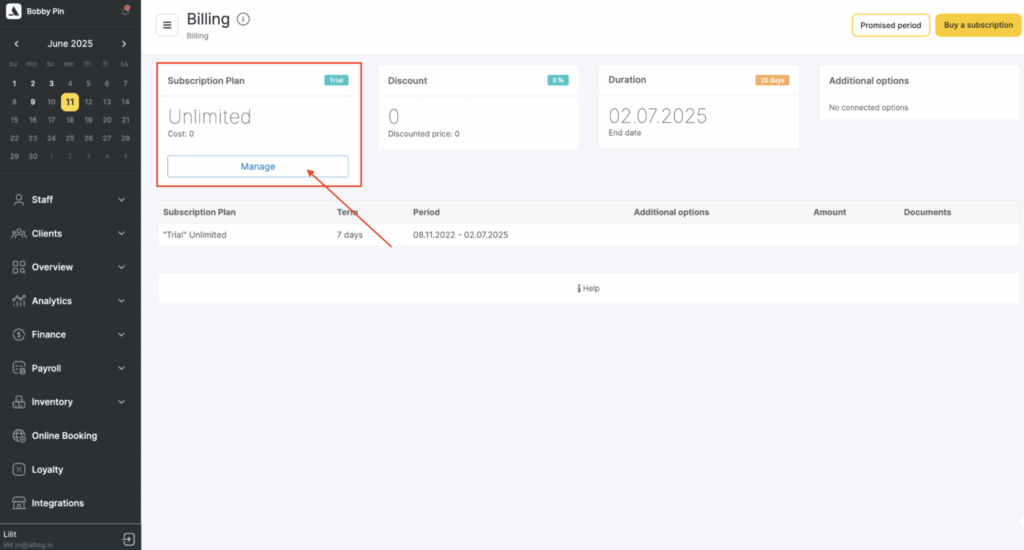
In the new “Management” section, click “Show all” under “Billable” to see the full employee list.
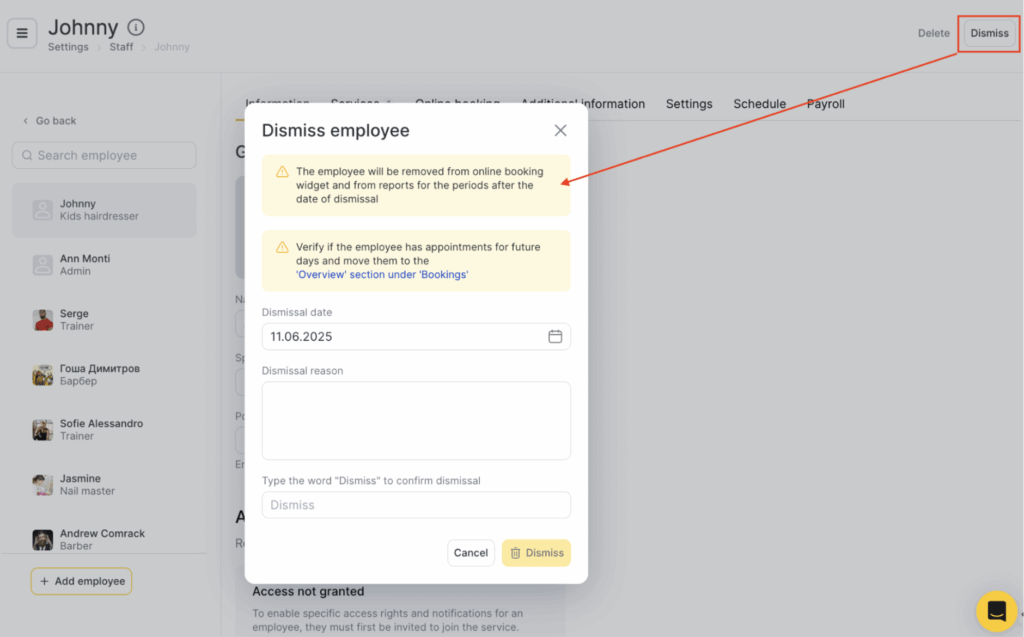
Click the name of the employee you want to dismiss. Ensure the employee has no active schedule.
In the opened window, click “Dismiss” in the top-right corner.
Enter the dismissal date and reason, type “Dismiss” to confirm, and click the button.
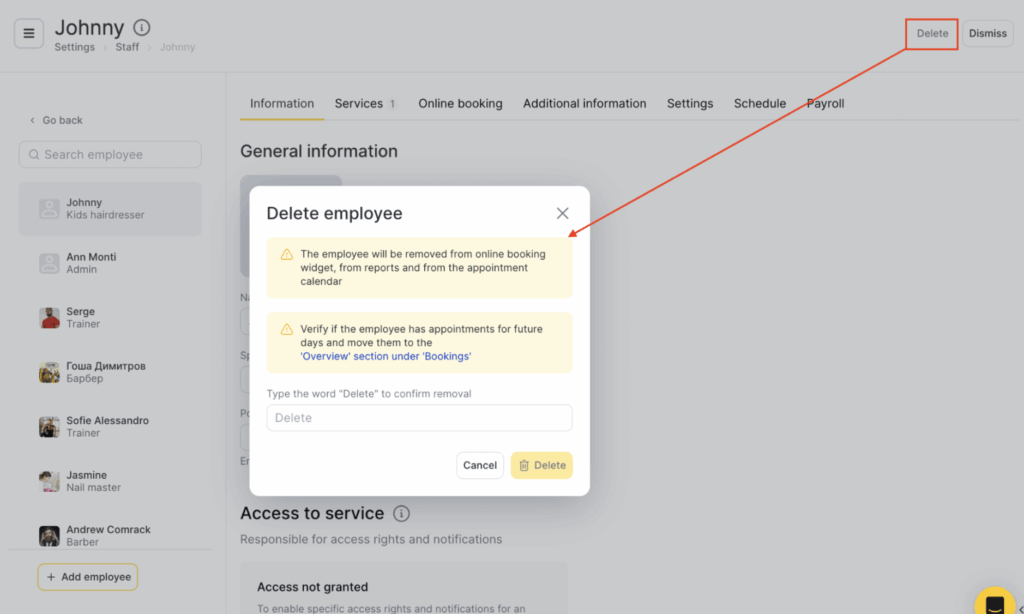
Note: We do not recommend deleting employees — deletion removes all data, while dismissal preserves statistics.
You can filter dismissed employees under Settings > Main settings > Staff using the “Dismissed” filter and view or edit their details.
If you delete an employee, their profile will only be visible after restoration.
Important #
• Dismissing or deleting an employee automatically unlinks any associated user.
• A dismissed or deleted employee can be restored within 24 hours. After that, restoration is only possible after 30 days.
• Records created for that employee are not deleted and remain in Overview > Appointments.
How to Delete Unneeded Users #
Check if your location still includes inactive users or if someone switched accounts but the old account remains in the location.
Important: Deleting a user from a location/network does not delete their Altegio account — it only removes access to the respective location/network.
Go to Billing > Subscription and click “Manage” in the “Subscription Plan” block.
In the new “Management” section, click “Show all” under “Billable” and “Non-billable” to see all employees and users.
Phone number and email used for login are shown next to each name.
If the user doesn’t provide services, they’ll appear under “Billable” or “Non-billable” based on their role and rights.
If a user is linked to an employee, they’ll show up in “Billable” under the “Access” column.

The “Last login” column shows their most recent login date. Red dates mean they haven’t logged in for a long time. Click on such users.
In the opened window, click “Delete user.”
A popup will appear: “Are you sure you want to revoke this user’s access to the company?” Confirm to remove the user from the location.
If the user is added to multiple locations, you can select from which ones to delete them. Select one or more locations and click “Delete.”
Note: If the user is added to only one location, or the person deleting doesn’t have access to other locations, the dropdown list won’t appear — deletion will be limited to that one location.
Managing Access Rights and Roles #
Check the roles and access permissions granted to active users. Ensure they match reality — for example, an administrator or manager may be using the “Owner” role, even though they’re not the actual owner.
- Go to Billing > Subscription and click “Manage” in the “Subscription Plan” section.
In the “Management” section, click “Show all” under both “Billable” and “Non-billable” to view the full list.
Check the assigned roles in the “Access” column. To edit, click on the role.
On the opened page, go to the “Access rights” tab.
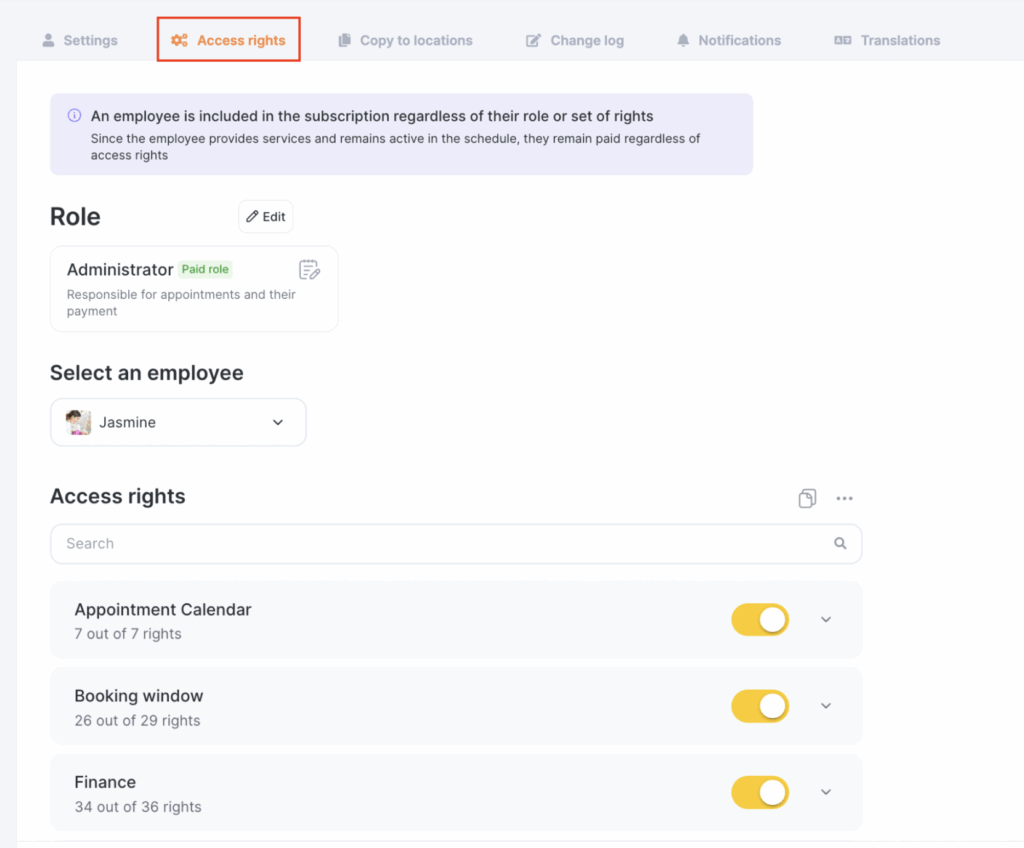
Check granted rights. If the “Specialist” role is used, make sure the correct employee is selected.
You can also switch roles on this tab. Ensure employees who don’t provide services or are not admins don’t have unnecessary rights.
- After editing, click “Save” at the bottom.
How to Link a User to an Employee #
Check if your employees have roles and access like “Specialist” or “Administrator.” If not already done, link users to employees.
Go to Settings > Main settings > Staff.
Filter employees using the “Access” = “Without access” filter and click “Find.”
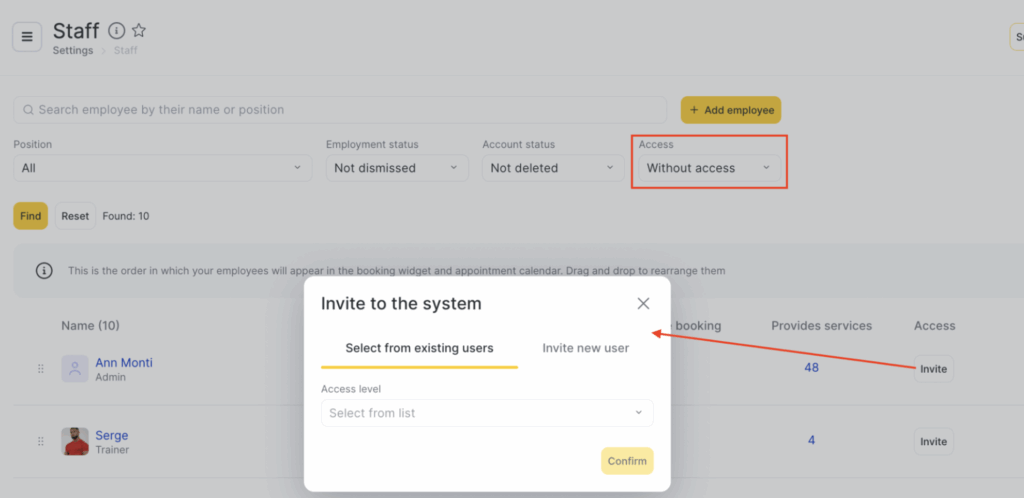
Click “Invite” next to the needed employee.
If the user already has Altegio access, select their name from the dropdown and click “Apply.”
You can also link users in Billing > Subscription > Management the same way.
- If you made a mistake, unlink the user from the employee in the employee settings. Click the name, go to the “Settings” tab, and click “Unlink.” Confirm the action.
If you manage a chain with multiple locations, we recommend performing the same employee/user checks in each one.


