
This guide will help you connect your Instagram and Facebook accounts to Altegio enabling the Book Now button on your social media profiles. Follow these steps to set up the integration:
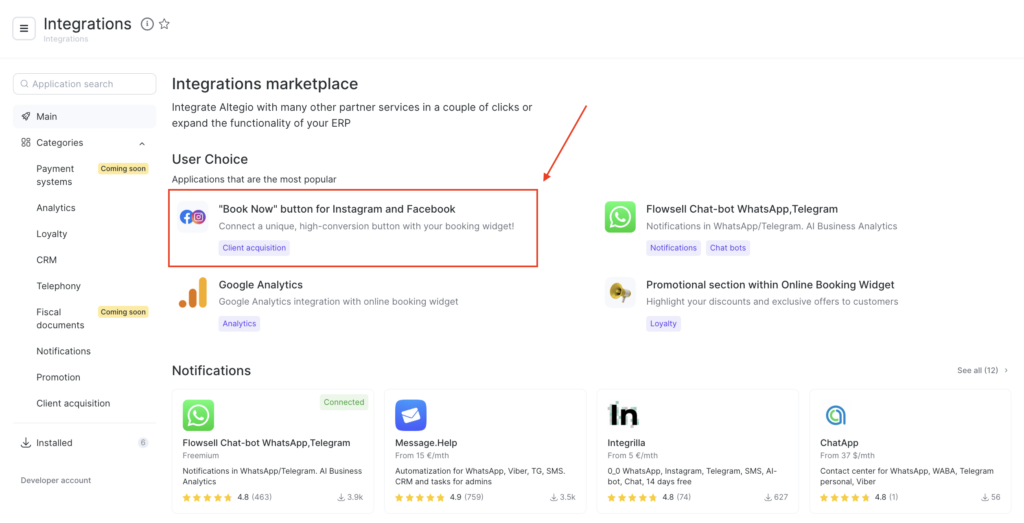
Connect the App from the Marketplace #
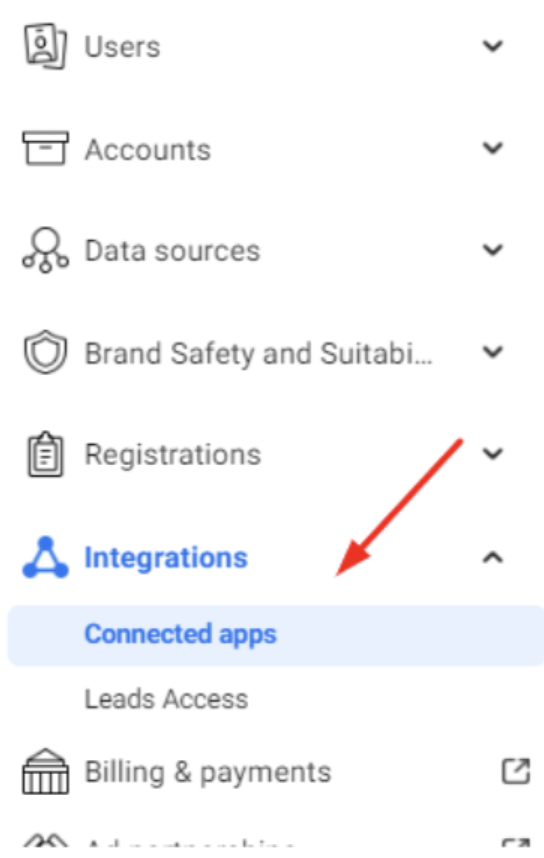
- Log in to your Altegio account and navigate to the Integrations section within the Administration mode from panel on the left side.

- In the search bar enter the ‘book’ keyword to locate and add the app to your account.
Connect to App #
- Open the app within Altegio and click the Connect button on the right.
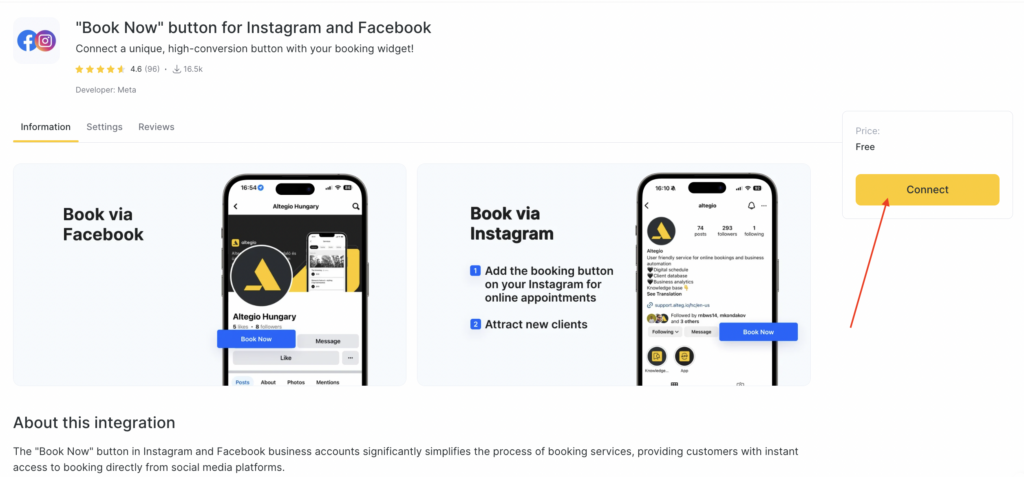
- You will be redirected to the Settings tab.
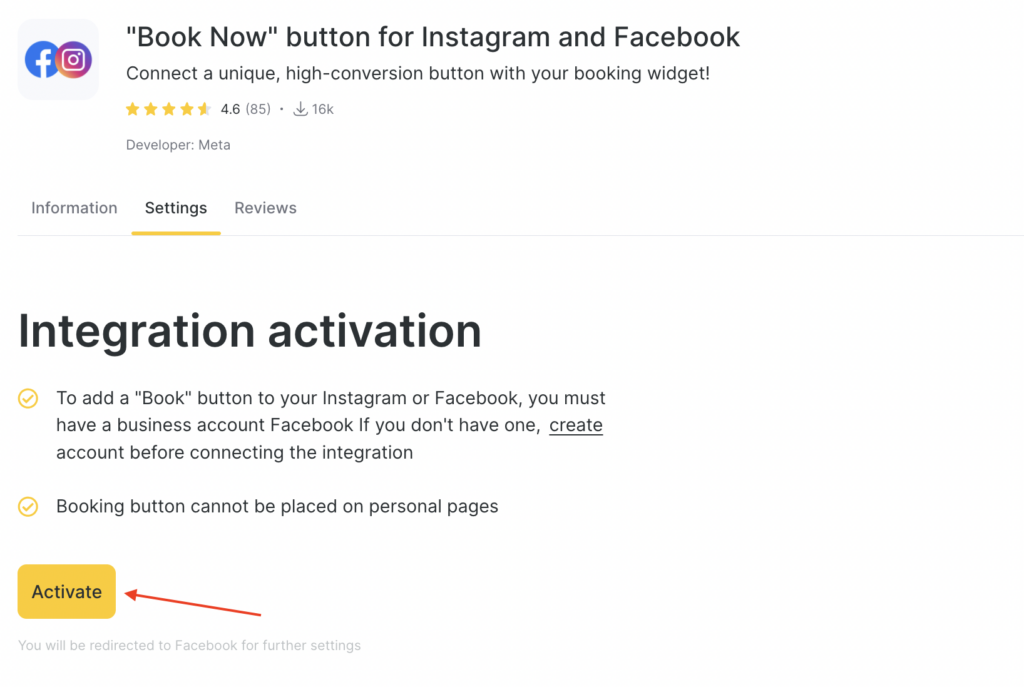
- Click Activate and choose the online booking form you wish your clients to see on your Facebook or Instagram page.
Note
Booking button cannot be placed on personal pages. To add a “Book Now” button to your Instagram or Facebook, you must have a business account Facebook. If you don’t have one, create an account here before connecting this integration.
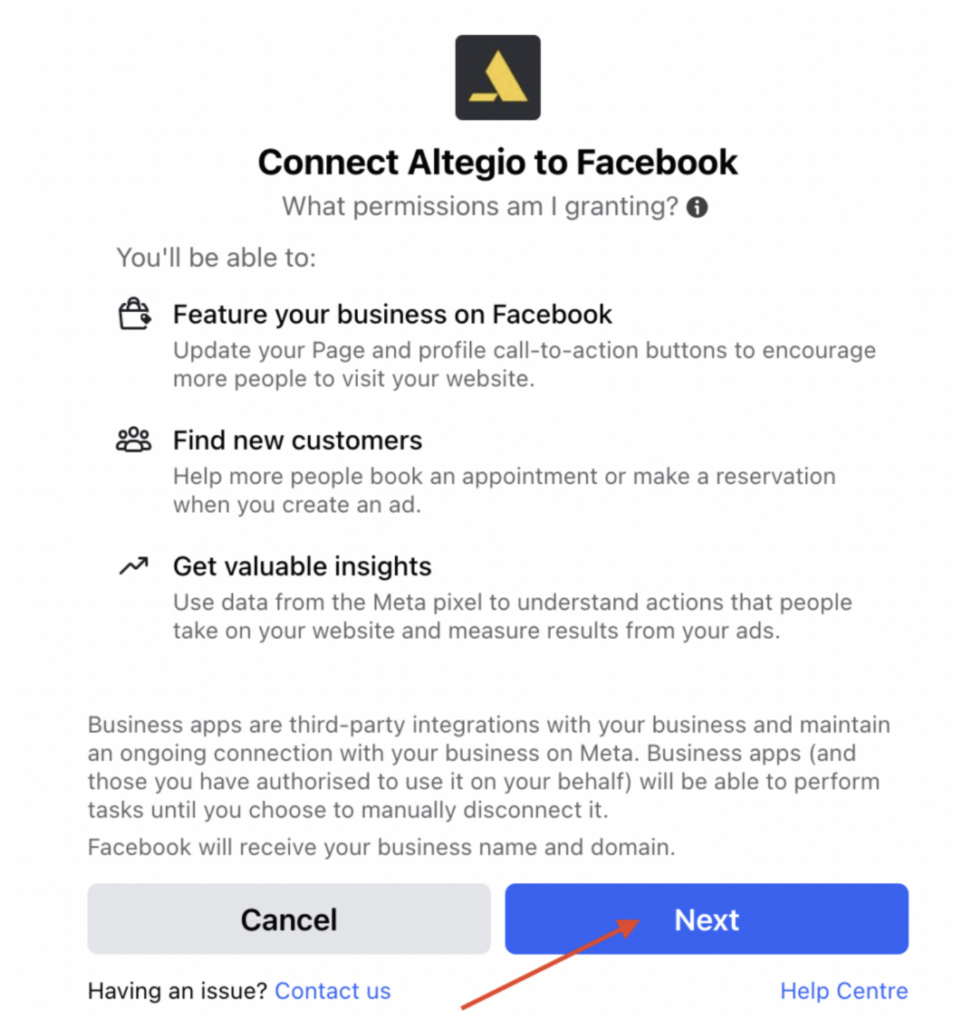
- Once you have selected your online booking form, click Next.
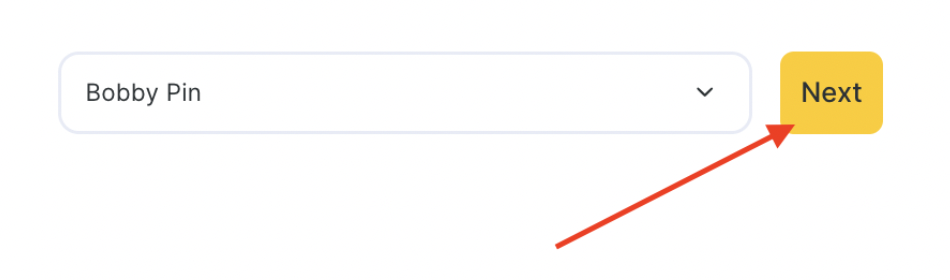
- You will be redirected to Facebook.
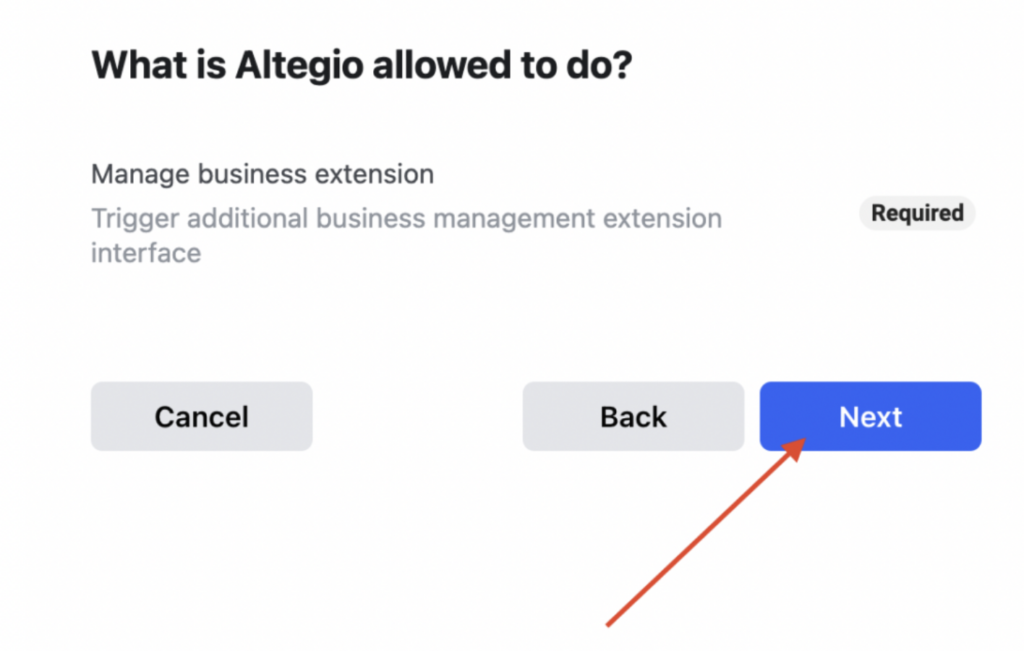
- Click the Next button to allow the connection.
Choose Your Social Media Account #
- Select whether you want to add the “Book Now” button to your Facebook or Instagram accounts. Select the accounts you want to run the integration for. Follow the onscreen instructions provided by Facebook. On the final step, confirm the account selection and proceed.
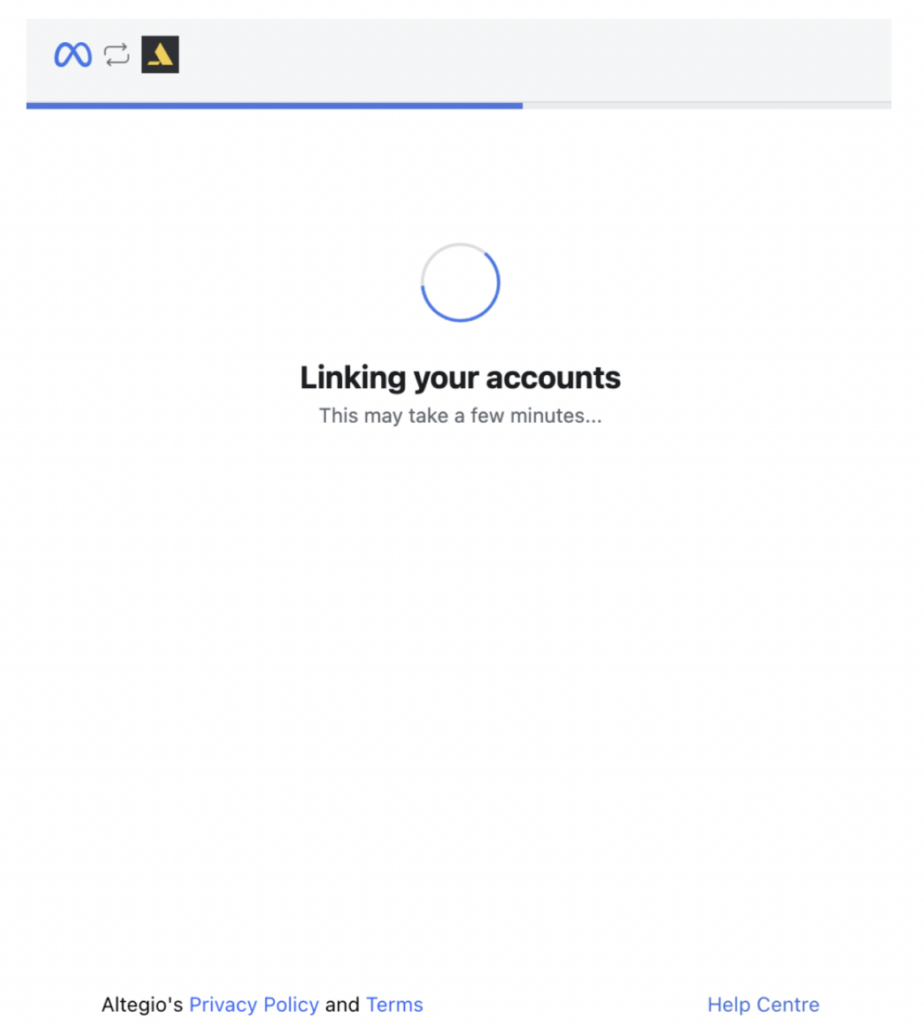
- Allow a few minutes before the integration connection takes place. Don’t close the window you might be seeing below.
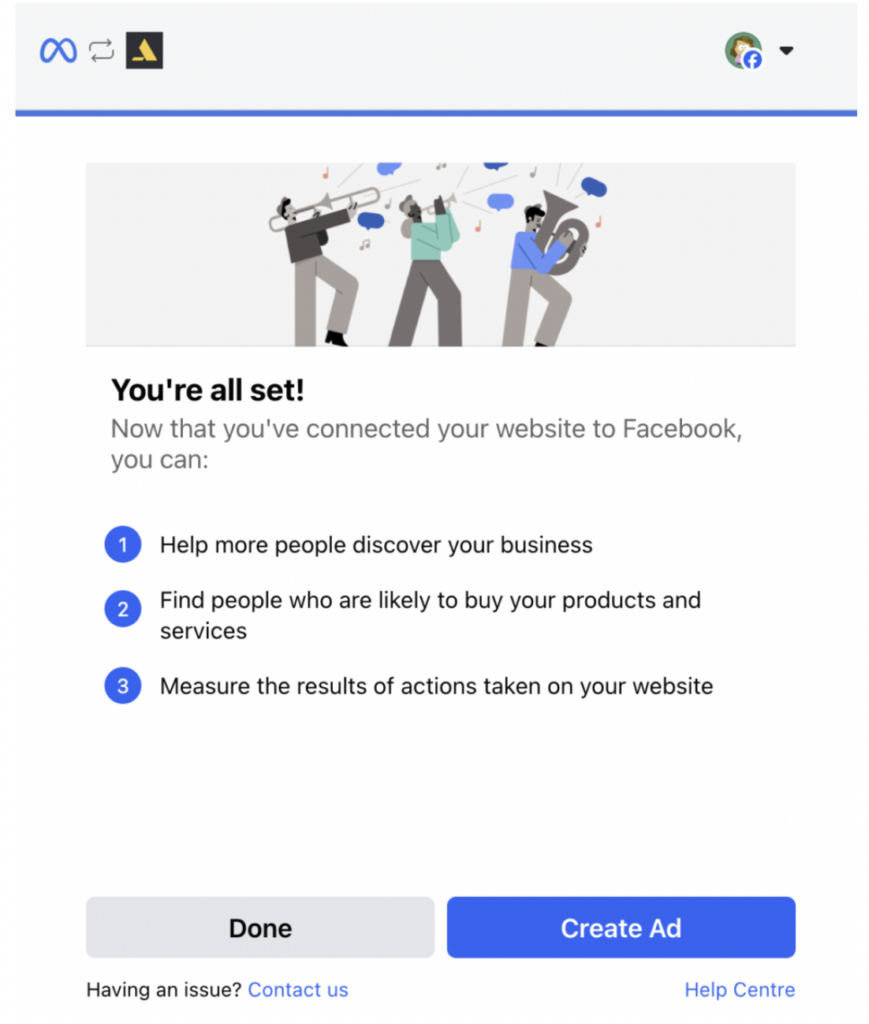
- Later, you will see a success page, notifying you about integration being all set.
What should I do if the integration was not connected? #
If you have problems with the integration, you need to set it up again. To do this:
- Clicking the Disconnect button in the Integrations section is not enough to fully remove the Altegio and Meta connection.
- Go to Integrations > Connected apps.
- Select Altegio from the list of connected apps and click Remove app.
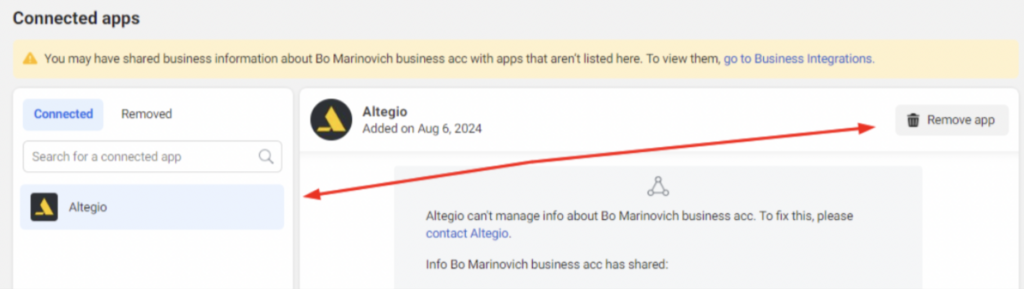
- Confirm your choice.
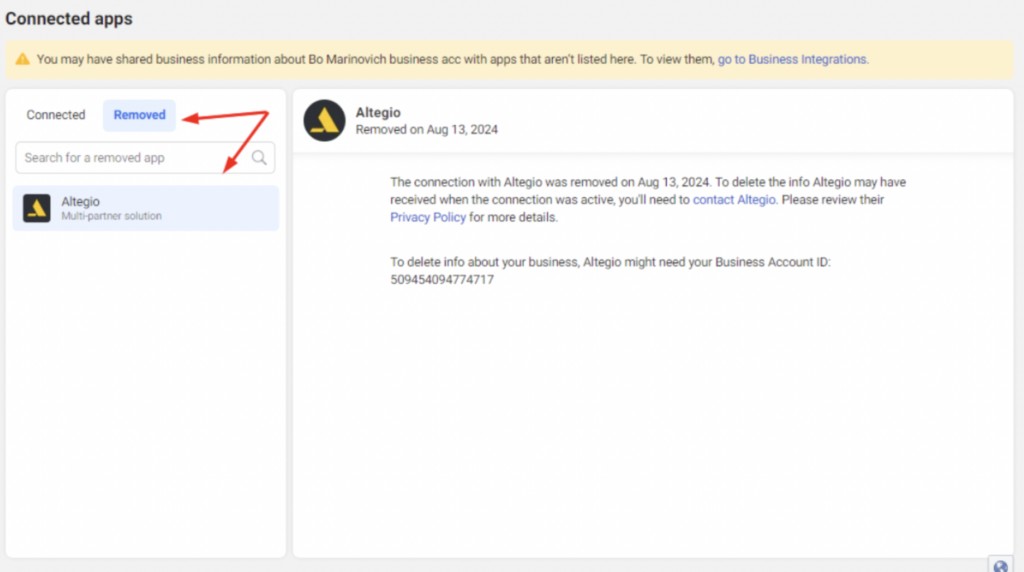
- After that, Altegio will appear in the Removed list, and you will be able to set up the integration again.
Finalize the Button Setup on Facebook #
If you are setting up for Facebook, visit your Facebook page.
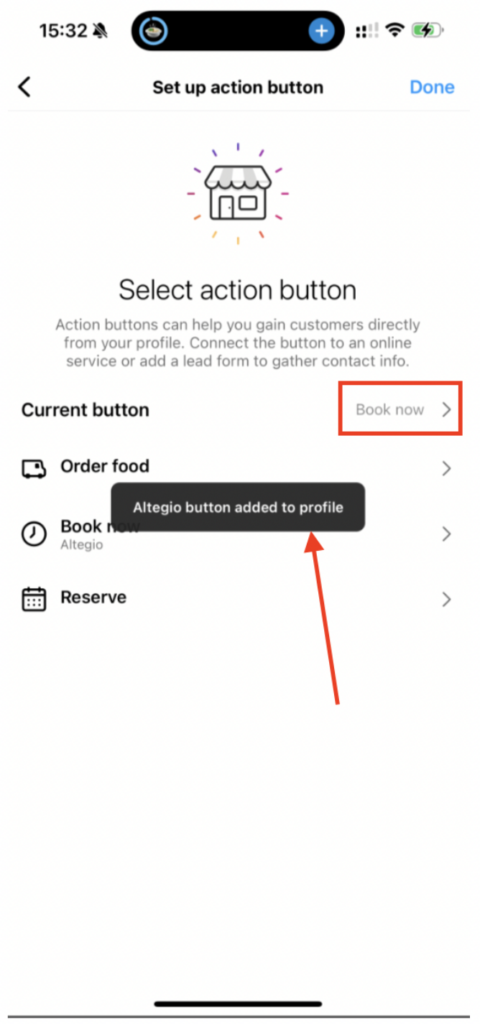
- Click on the three dotted menu on the right and select “Edit Action Button” from the drop down list.
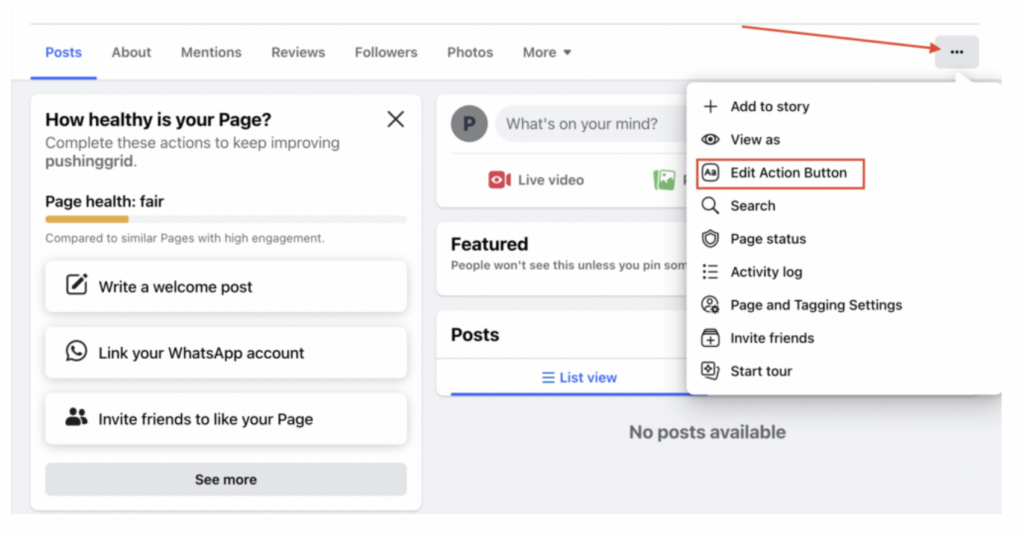
- Choose the appropriate button to finalize the setup.
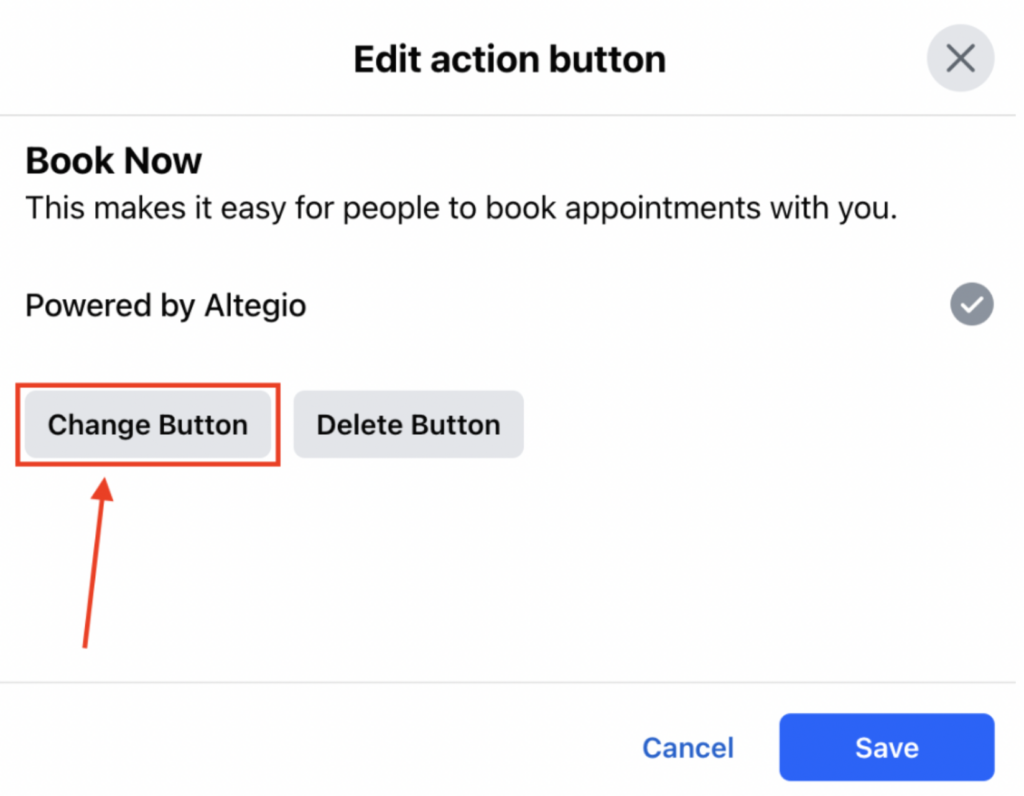
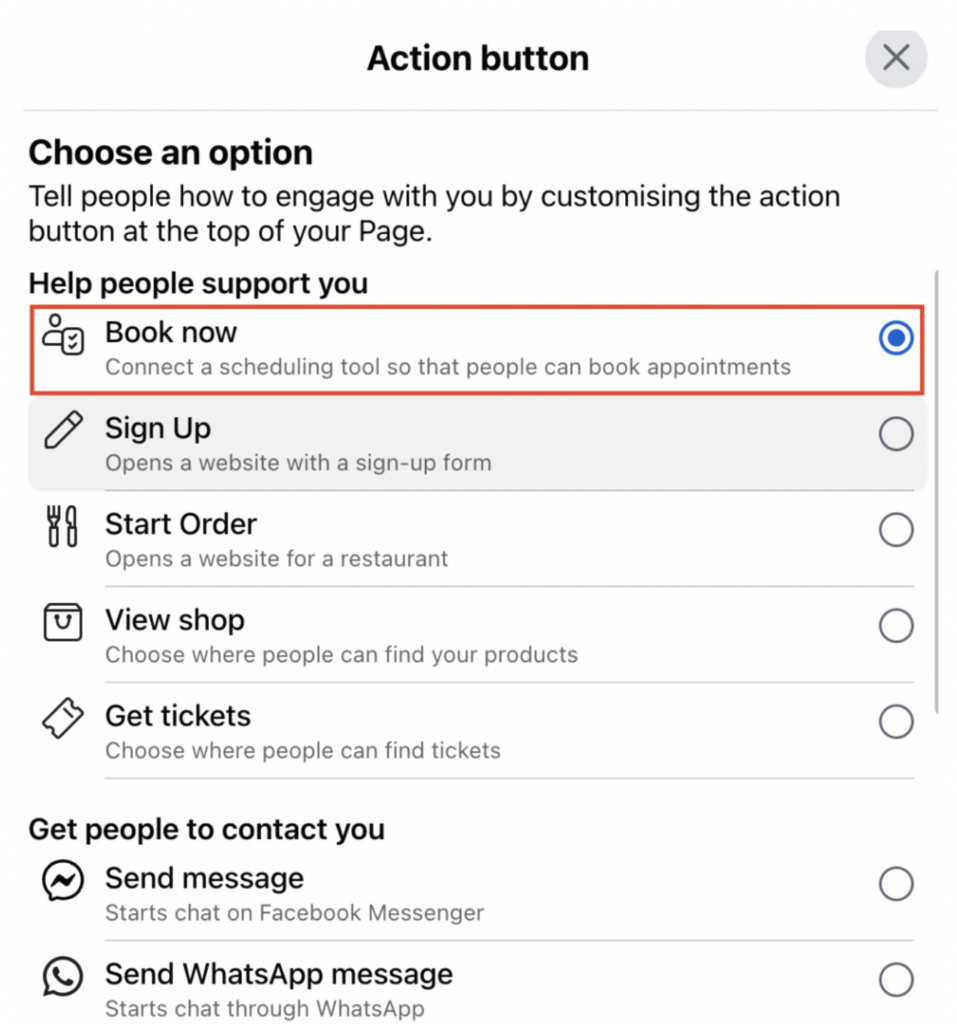
- Click the “Change Button” button, select the “Book now” option and click Next.
- You will be redirected to another screen with a preselected Altegio-powered Scheduling tool.
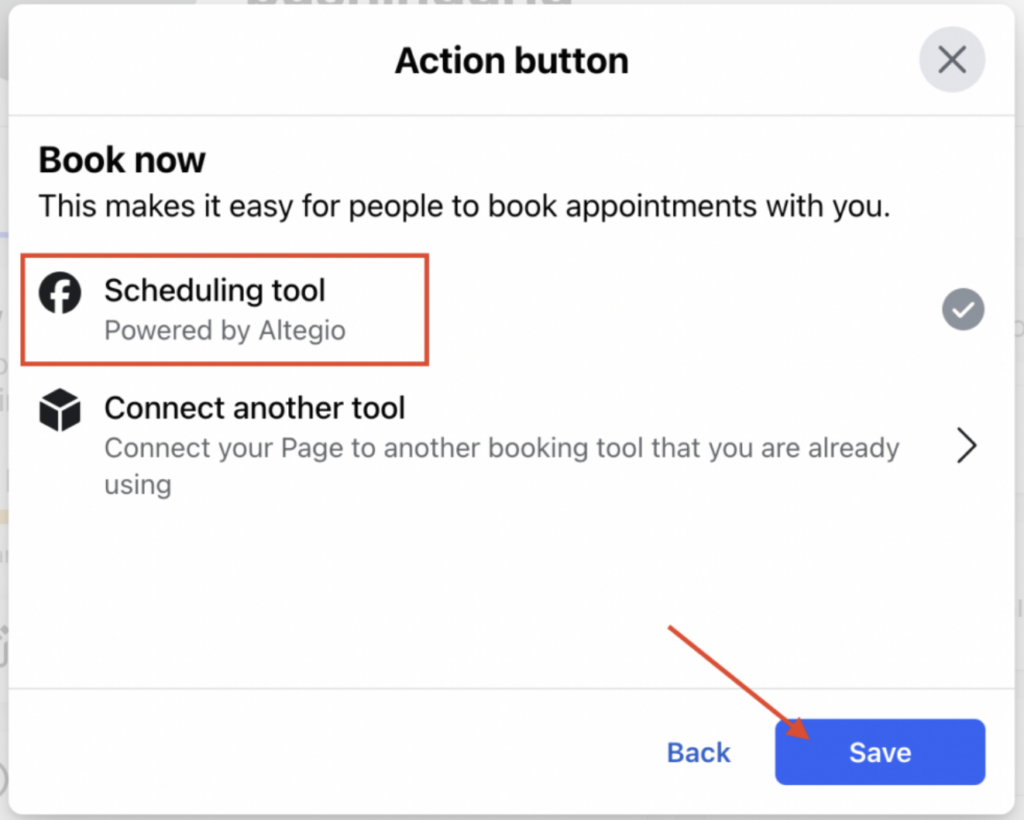
- Click the Save button to conform the changes.
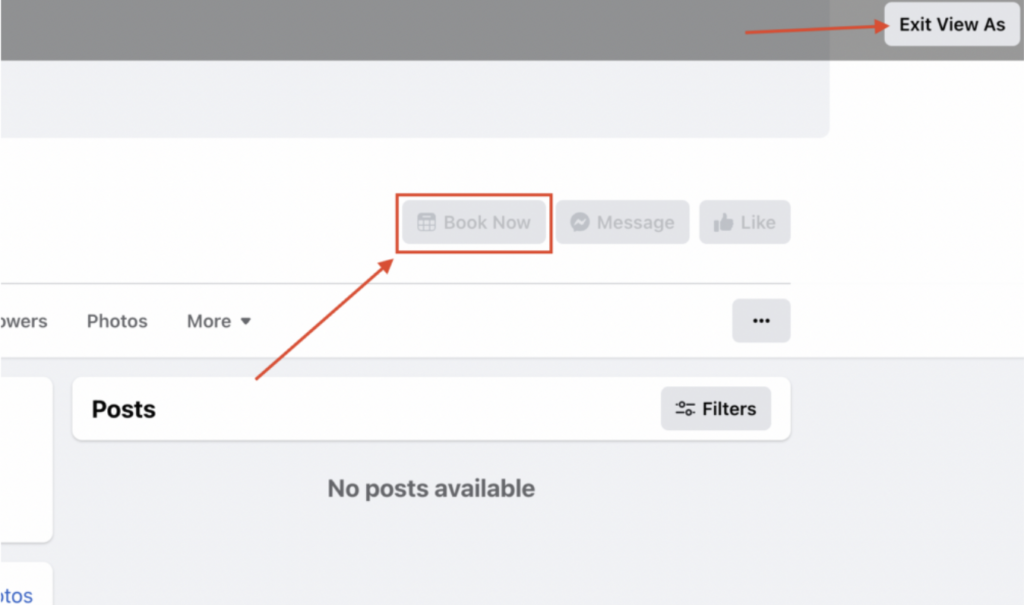
Viewing the button #
To see how the button looks on your Facebook:
- Go to the tree dotted menu on the right and select the View As mode.
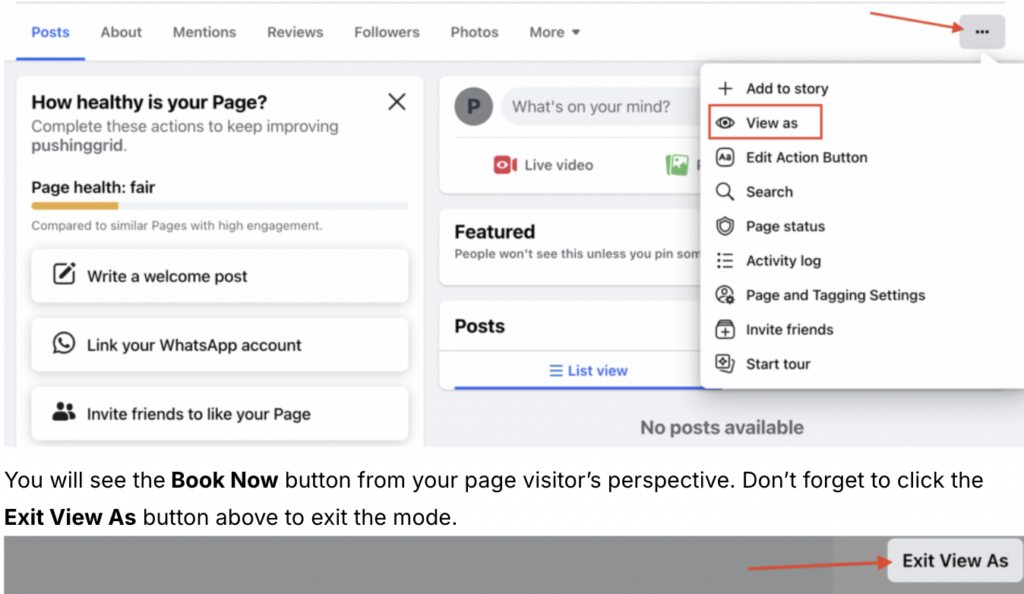
- You will see theBook Now button from your page visitor’s perspective.
- Don’t forget to click the Exit View As button above to exit the mode.
Activating the Action Button on Instagram #
Activating the action button on your Instagram profile can significantly enhance your business’s ability to connect with customers and streamline the booking process. Here’s a step-by-step guide on how to activate the action button using Altegio:
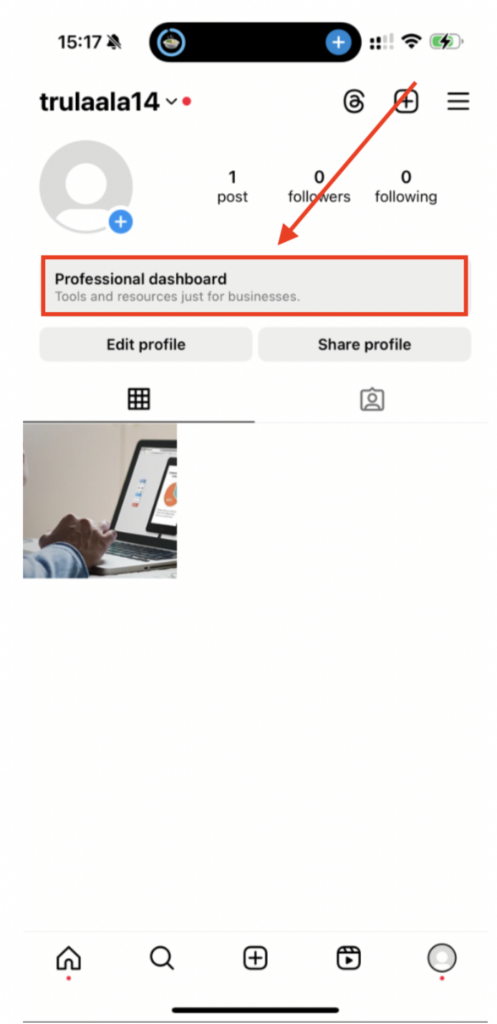
- Open Instagram and navigate to your profile. Access the “Professional dashboard” at the top of your profile page. On the Professional dashboard and select “Edit profile.” In this section, you will see options to add links, business information, and action buttons.
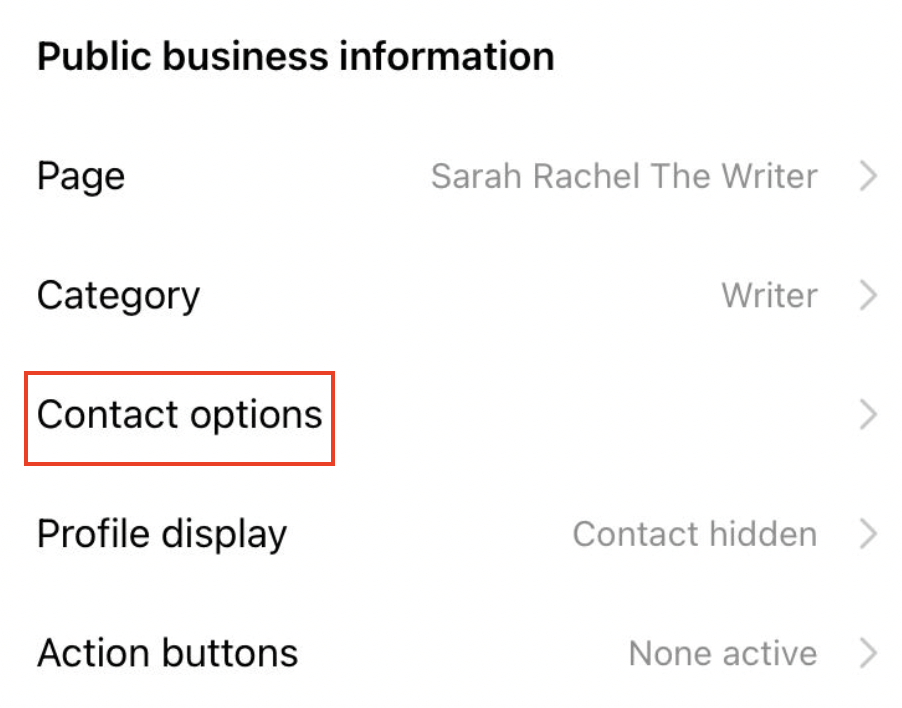
- Scroll down to the “Public business information” section and select Contact Options
- Find and add an action button from the list.
- After selecting the action button, a list of service providers will appear. Look for Altegio in the list.
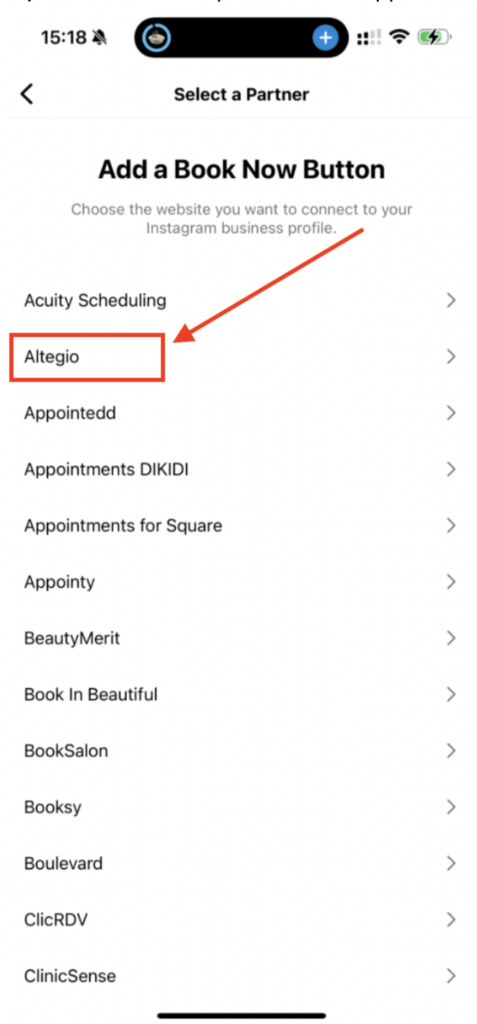
- Click on Altegio to proceed. Choose between “Connect Book Now button” or “Login into Altegio account” options based on your login status at the time.
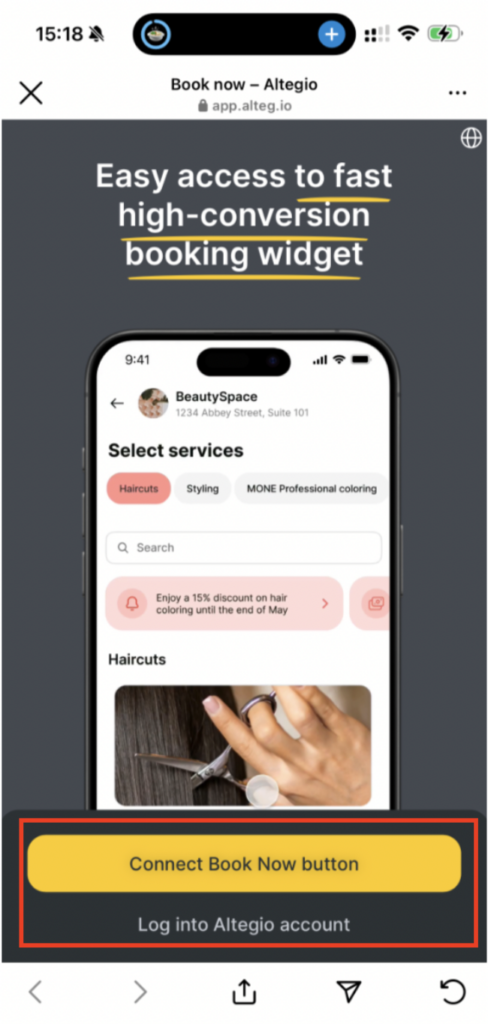
- If you want to log in, you will be redirected to the Altegio login page. Enter your phone number or email and password, then click “Sign in.”
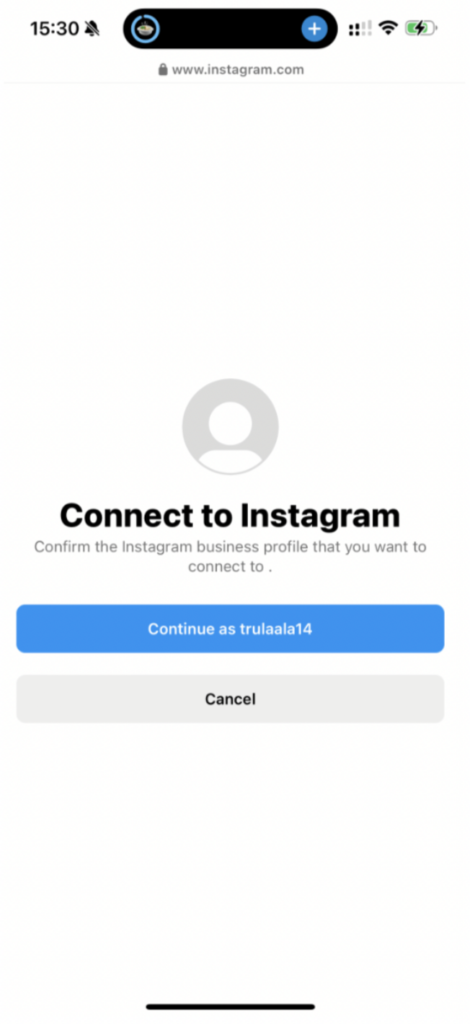
After logging in, you will need to connect your Altegio account to your Instagram profile. Click on “Continue as [your Instagram username]” to confirm the connection.
- Once connected, you will see the “Confirm settings” page.
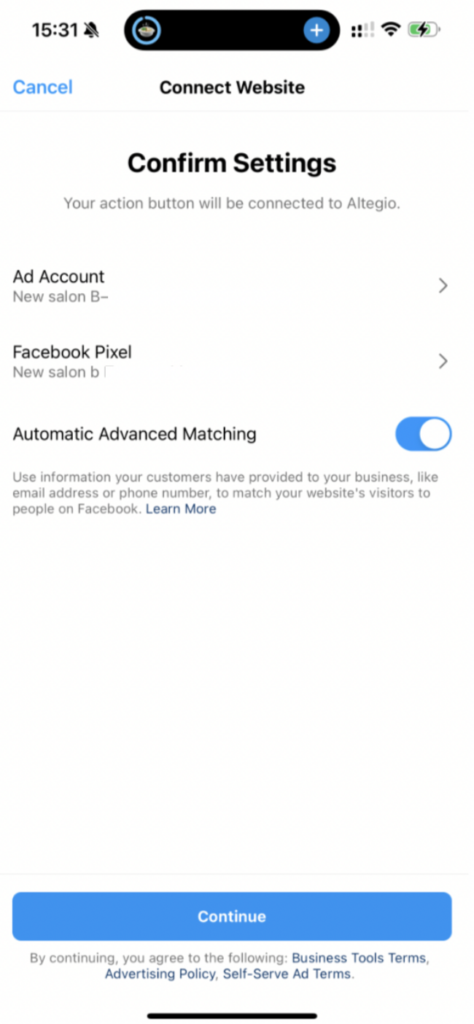
- Press the Continue button below. The system will now connect Altegio to your Instagram profile. This process may take a few moments, so please be patient.
- Once the connection is complete, you will see the status of your current action button. Confirm that the “Book now” button is active and linked to Altegio.
- Go back to your Instagram profile to see the “Book now” button. Test the button to ensure it directs users to your Altegio booking page.
Test the Integration #
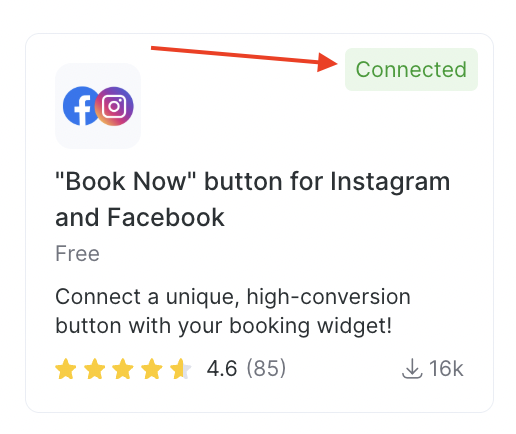
Upon successful connection you will notice a green “Connected” badge under Integrations> Installed Apps section.
Once everything is set up, test the “Book now” button to ensure it functions correctly and redirects to the appropriate booking widget in Altegio.
By following these steps, you can enhance your social media presence and make it easier for clients to book appointments directly from Instagram or Facebook. If you encounter any issues during the setup process, contact Altegio support for further assistance.
Note
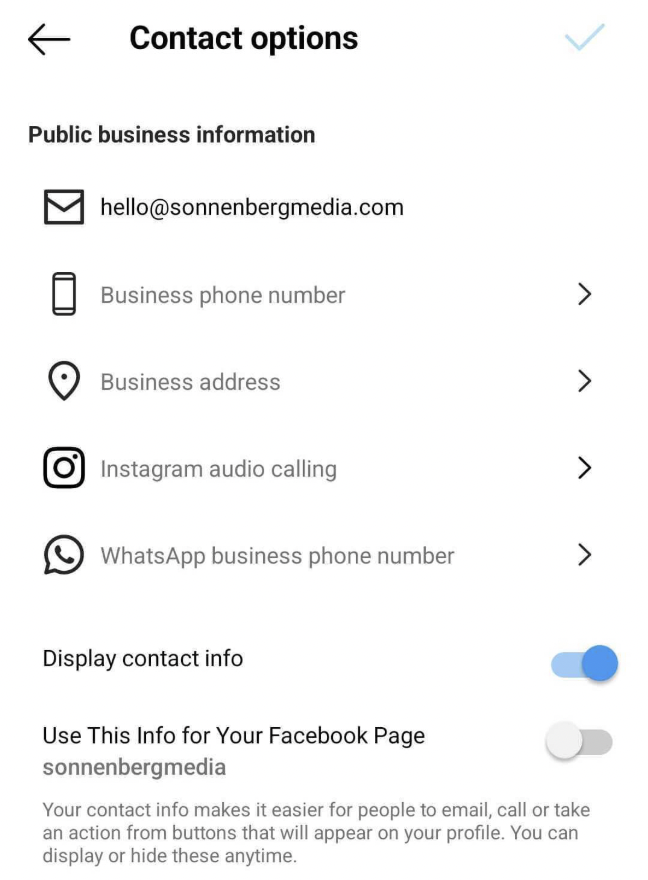
If the button displays normally, then you don’t need to do anything. On some devices, only the “Contact us” button is visible; it is better to hide it (people usually don’t use it) so that the “Book now” button is displayed without additional ones in a drop-down menu.
- Click on Edit profile;
- Next to Contact options;
- Turn off Display of contact information;
- Disable other options if they were enabled (for example, calls via Instagram).
Hide the Contact button #
If the Book button is displayed correctly, no action is needed. However, on some devices only the Contact button may be visible, and it can cover the Book button. In this case, you can hide it (it is usually used less often) so that the Book button is displayed without an additional menu. To do this:
- Click Edit profile;
- Then go to Contact options;
- Turn off Display contact info;
- Disable any other options if they are enabled (for example, Instagram calling).
For more details, see the tutorial videos:

