
After you add all team members and assign access rights, configure the notifications the team member will receive.
In Altegio, there are two types of team member notifications:
- for team members who provide services
- for receptionists or other location team who do not provide services
There are also different delivery channels for notifications:
- Push
- SMS (a paid channel; messenger notifications are also sent under this channel)
- Web (free channels)
We’ll break down in detail in this article what needs to be configured for a team member to start receiving notifications.
Once you complete the setup described below, team members and receptionists who work via the Altegio mobile app will be able to turn the push notifications they need on and off directly in the app.
Important
To send any notifications, the team member/receptionist (any role) must have location access configured.
Setup and editing #
Enabling delivery channels #
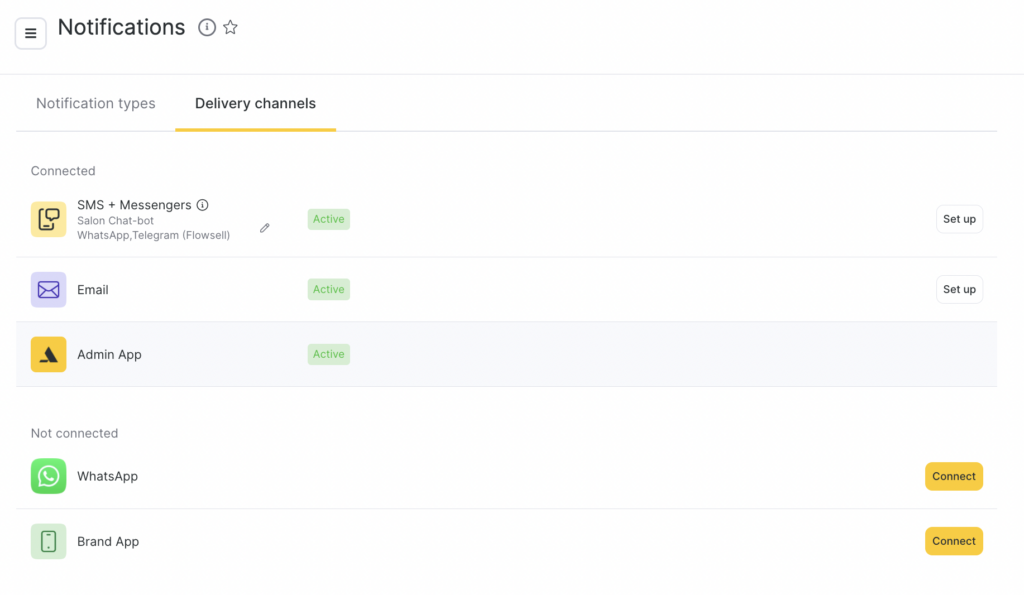
Before configuring notifications for a team member with access, you need to enable delivery channels in Settings > System settings > Notifications > Delivery channels. Delivery channel settings are described in detail in the article.
Configuring notification types #
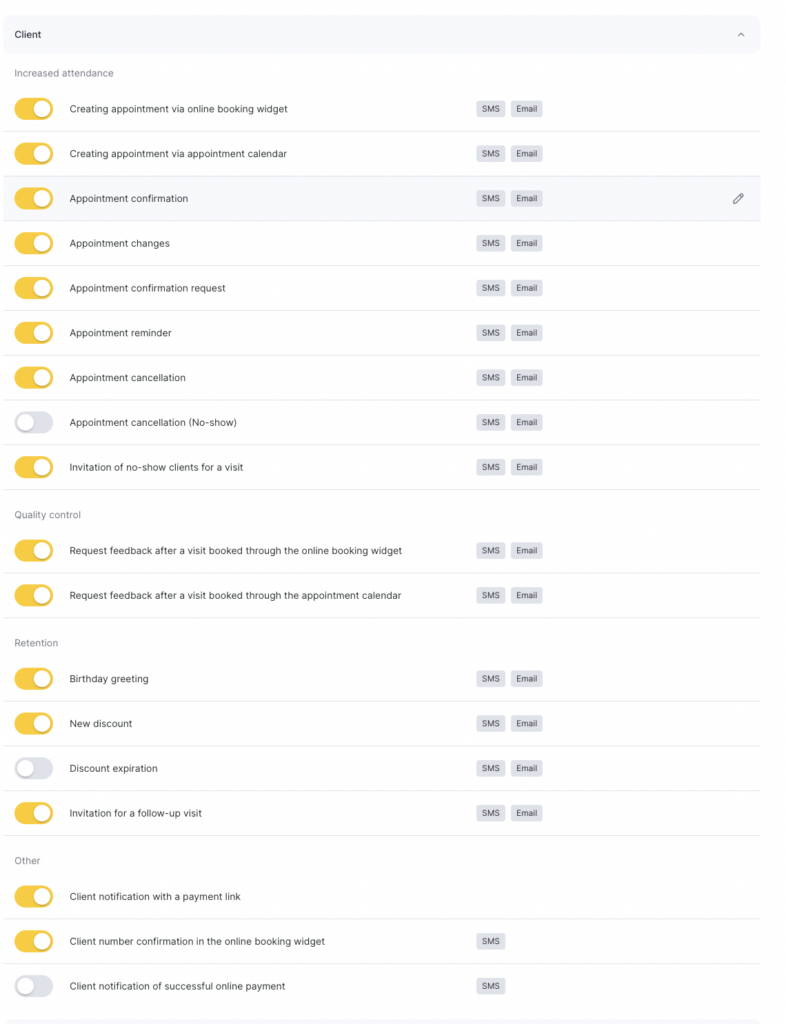
After configuring and connecting the required delivery channels, set up notification types for administrators and team member in Settings > System settings > Notifications > Notification types.
Important
If notification types and channels are not enabled, they will be inactive in the team member’s notification settings.
Granting access to the team member #
After setting up delivery channels and notification types, go to Settings > Main settings > Team (or Billing > Subscription > Management) and click Grant access in the Access column.
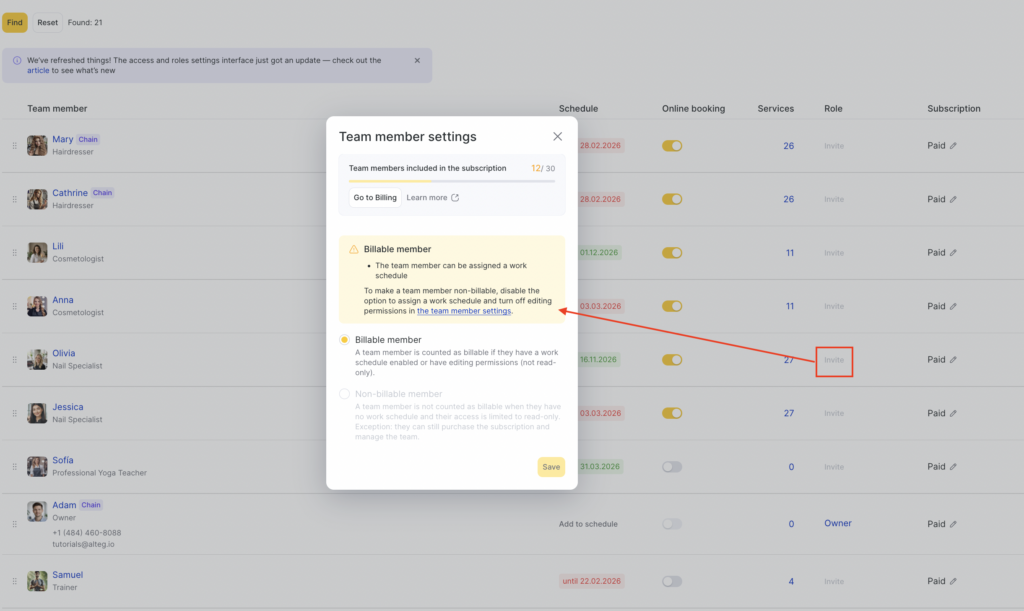
More details on assigning a role and access to a team member are available in the article.
If the team member already has a role assigned, skip this step.
Important
If there is no link between a team member and an access role, notifications of the “For team member” type will not be sent.
For administrators, owners, and other staff who do not provide services, linking a role to a service-providing team member is not required.
Configuring team notifications #
- In Settings > Main settings > Team (or Billing > Subscription > Management), click the team member’s name.
- In the window that opens, go to the Notifications tab.
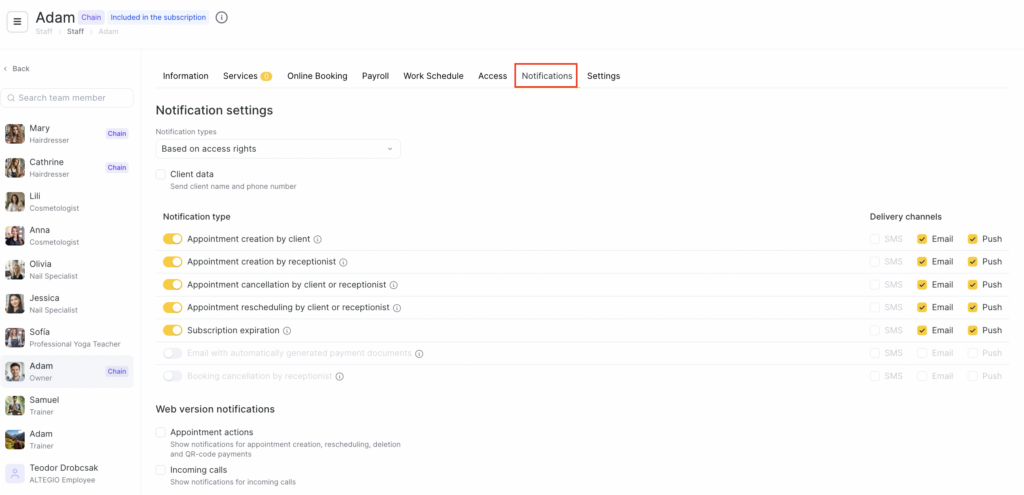
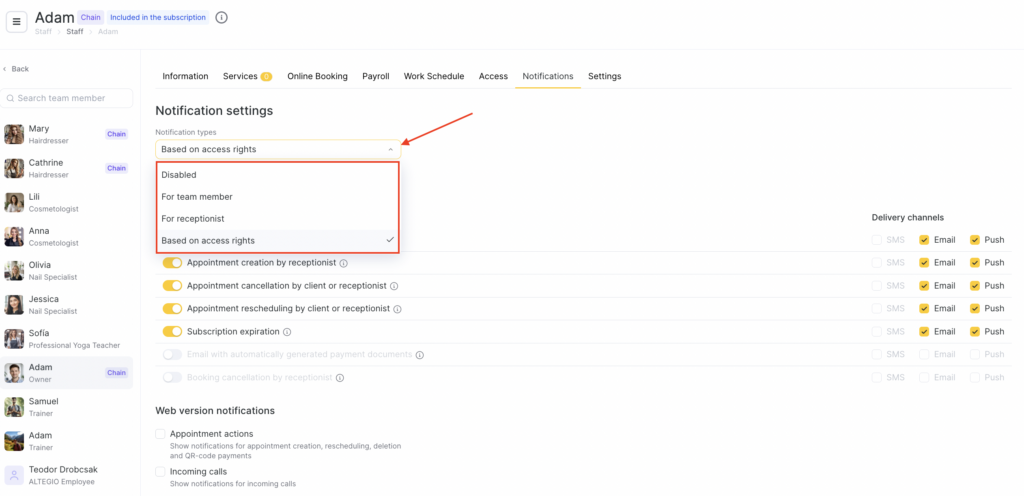
From the dropdown list, choose which notification type the team member will receive:
- For receptionist— notifications of the “For receptionist” type will be sent.
- For team member — notifications of the “For team member” type will be sent.
- Based on access rights — Altegio automatically determines the notification type based on the team member’s access rights.
If you need to add notification delivery via other channels (SMS, email, Web), this can only be done manually in the team member’s notification settings.
If Based on access rights is selected, the actual notification type is determined as follows:
- Has permission to view one team member’s schedule > “For team member”
- Has root access to the appointment calendar > “For receptionist”
- The type is recalculated whenever access rights change.
Client data. If you uncheck “Send the client’s name and phone number”, the team member will not receive the client’s contact details in SMS, email, and push notifications, but will still receive all other appointment details (time, service, etc.).
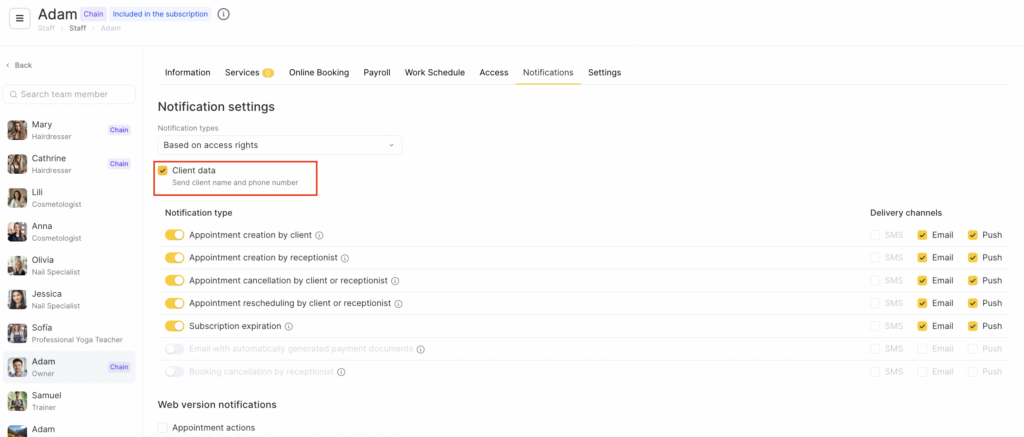
Select the required notifications the team member/receptionist should receive and the delivery channels (SMS, push, or email).
Notification types include: #
- Appointment created by a client
- Appointment created by a receptionist
- Appointment deleted by a client or receptionist
- Appointment rescheduled by a client or receptionist
- Subscription expiration
- Email with automatically generated payment documents
- Appointment cancelled by a receptionist
To send notifications via SMS, Email, Push, you must first configure the corresponding notification types (as described earlier in this article).
If you can’t tick a channel checkbox, it means that in Settings > System settings > Notifications, the notification type or the channel itself is disabled in its settings.
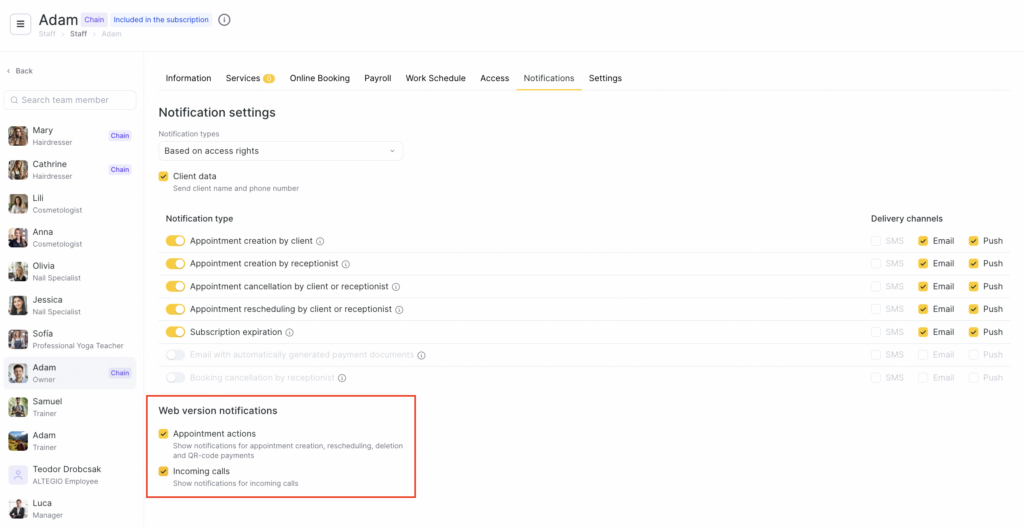
Notifications in the web version #
Web notifications are not connected to channel-based notifications. To show web notifications, it’s enough to enable the relevant checkboxes.
Appointment operations #
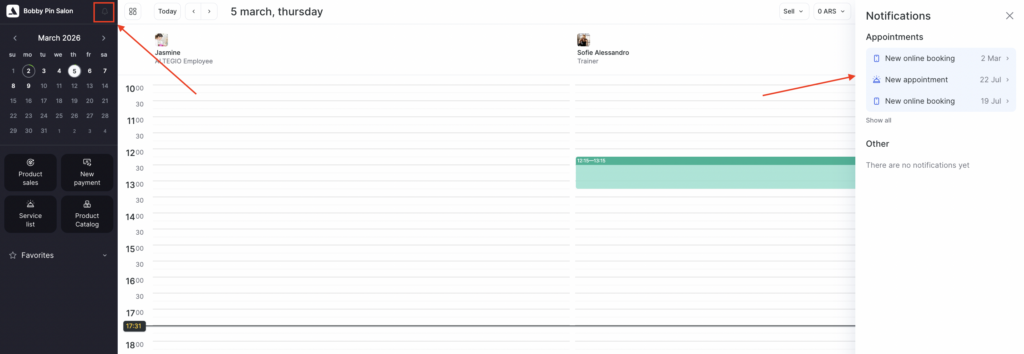
A pop-up notification about appointment operations appears in the bottom-left corner. All pop-up notifications can be viewed in the Notification Center (click the bell icon in the top-left sidebar).
Incoming calls #
If a telephony integration is connected for the location, you can display call notifications in the bottom-left corner in the web version.
Saving settings #
After making changes, click Save.


