Inventory audit helps you monitor whether product sales and consumables write-offs are up to date and identify discrepancies.
Creating an inventory audit #
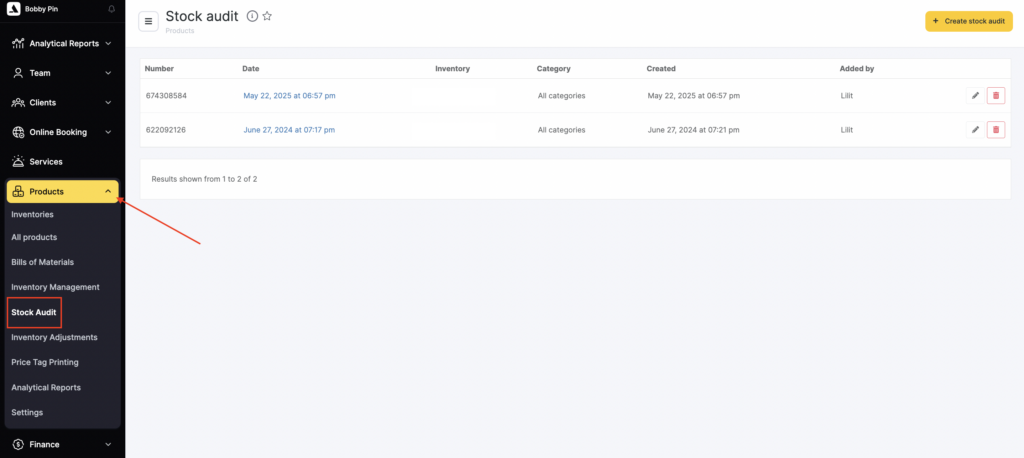
- Go to Products > Stock Audit and click Create stock audit.

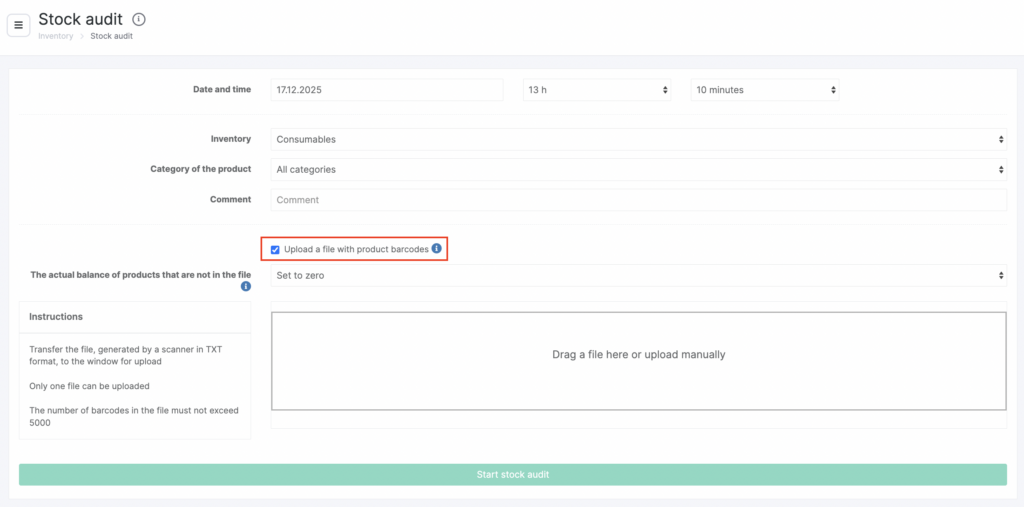
- In the window that opens, configure the details for this audit:
- date and time (filled in automatically);
- inventory;
- product category;
- comment.
- If needed, upload a file with product barcodes. The file in .txt format is generated by a special barcode scanner used in the inventory.
- Create a new text file on your computer (it must have the .txt extension).
- Click inside the opened file.
- Scan all barcodes for all products in the inventory. They will be added to the file. If you have multiple units of the same product, the same barcode will appear in the file multiple times (once per unit).
- Save the file with a name that makes sense to you.
- Check Upload a file with product barcodes.
- Set the parameter Actual stock for products not in the file to either “Set to zero” or “Set equal to calculated stock”.
- Drag and drop your file or upload it manually.
- Click Start inventory audit.
The number of times a barcode appears in the file equals the number of units that will be set as the product’s actual stock for sale.
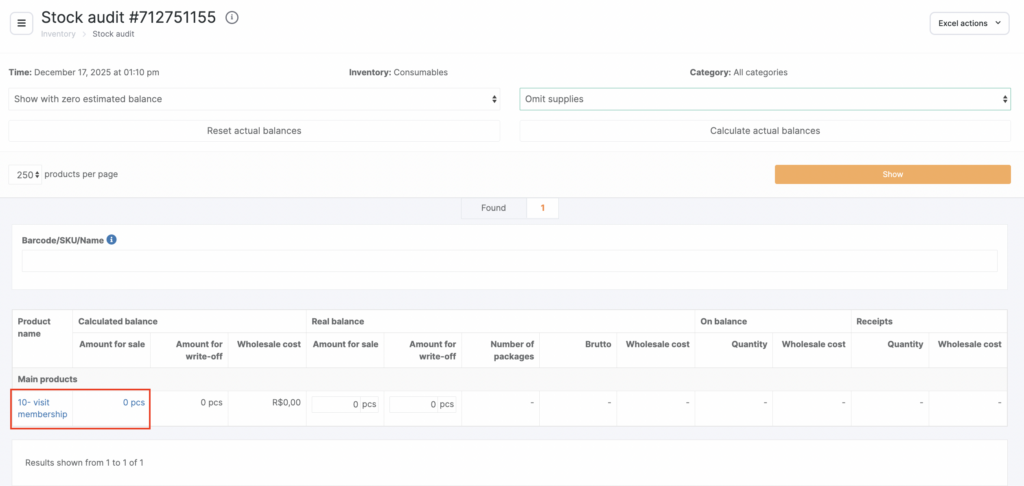
Inventory audit information #
The system automatically calculates all products that match the selected conditions (products in the chosen inventory and/or category) as of the current time.
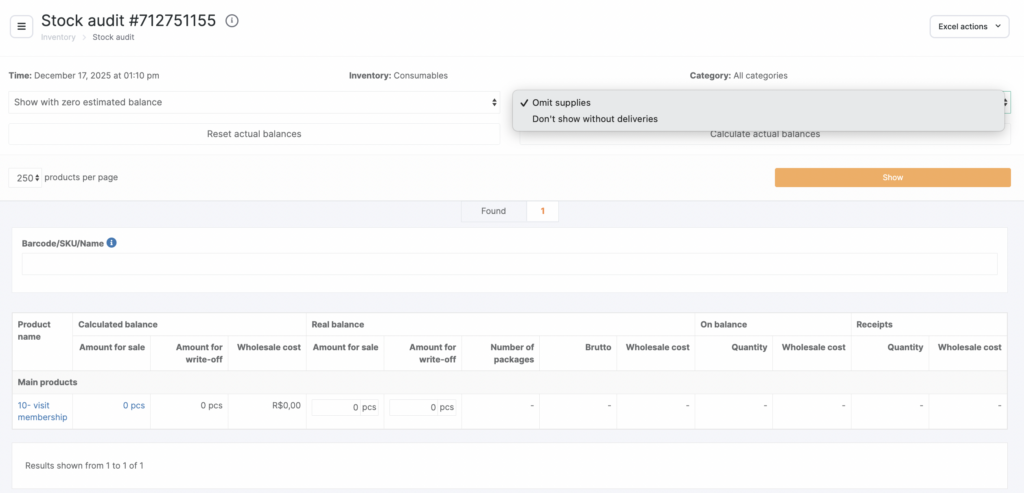
For convenience, you can use filters to sort products that haven’t had any inventory operations.
Products with negative quantities appear when items are written off from the inventory even though none were left in stock.
The values in the Product name and Quantity columns are clickable links. Clicking the product name opens the product card; clicking the quantity opens the inventory operations for that product.
What the different row colors mean #
- White — default color. Rows with no changes and no discrepancies.
- Blue — appears after you edit at least one value in the audit.
The row you edited remains white; rows you didn’t edit turn blue. - Green — a row that has just been edited.
- Red — indicates a discrepancy compared to the previous inventory audit.
A row can also turn red if inventory operations dated earlier than the audit were edited.
Working with the table #
- To enter real stock levels, count the inventory stock and enter values in Actual stock > Number of packs. After changing this column, values in other columns will update too. All write-off, weight, and cost price information is taken from the product card.
- If the inventory has opened, partially used packs, weigh the items directly in the packaging. To account for packaging weight, set net weight and gross weight in the product card (click the product name to open it quickly).
- If there is less stock than shown in the audit, a write-off operation will be created automatically (To write off column).
- If there is more stock than shown in the audit, a goods receipt operation will be created automatically (To receive column).
- All inventory audits are saved and can be edited. If you delete an inventory audit, all related inventory operations will also be deleted.
If you run inventory audits regularly and you later edit the second-to-last audit (or any earlier one), discrepancies in all subsequent audits will be highlighted in red.
You can find a product using the search bar for quick changes. If you select a product from the search list and press Enter, the product’s actual stock increases by 1. Don’t press Enter unless you need to. You can also use Ctrl + F to search within the table.
If you need to set all product stocks to zero, click Reset actual stocks — after confirmation, the actual stock for all products will be 0.
If you need to set actual stock equal to calculated stock (based on inventory operations), click Calculate actual stocks.
Where to find audit operations and export #
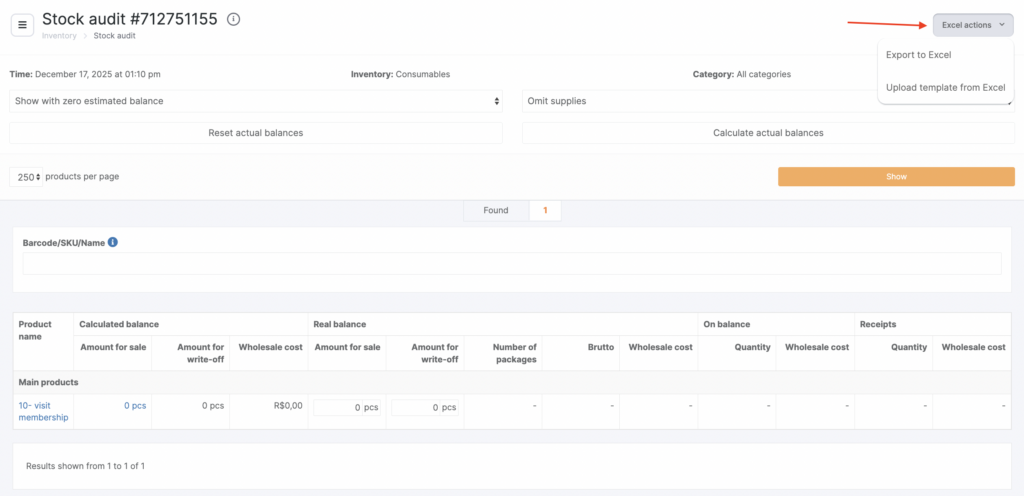
Operations created during the audit can be found in Products > Stock Audit. If you click the date of such an operation, the inventory audit document will open.
You can export the inventory audit to Excel via the top-right menu: Excel operations > Export to Excel.