
You can keep a patient’s medical record directly in Altegio.
This feature is available for the following business types in the Medical category:
- Medical center
- Dentistry
- Veterinary clinic
- Psychotherapy and psychology
- Alternative medicine
- Hospital
- Clinic / outpatient clinic
- Lab tests
- Diagnostic center
- Women’s health clinic
- Other medical services
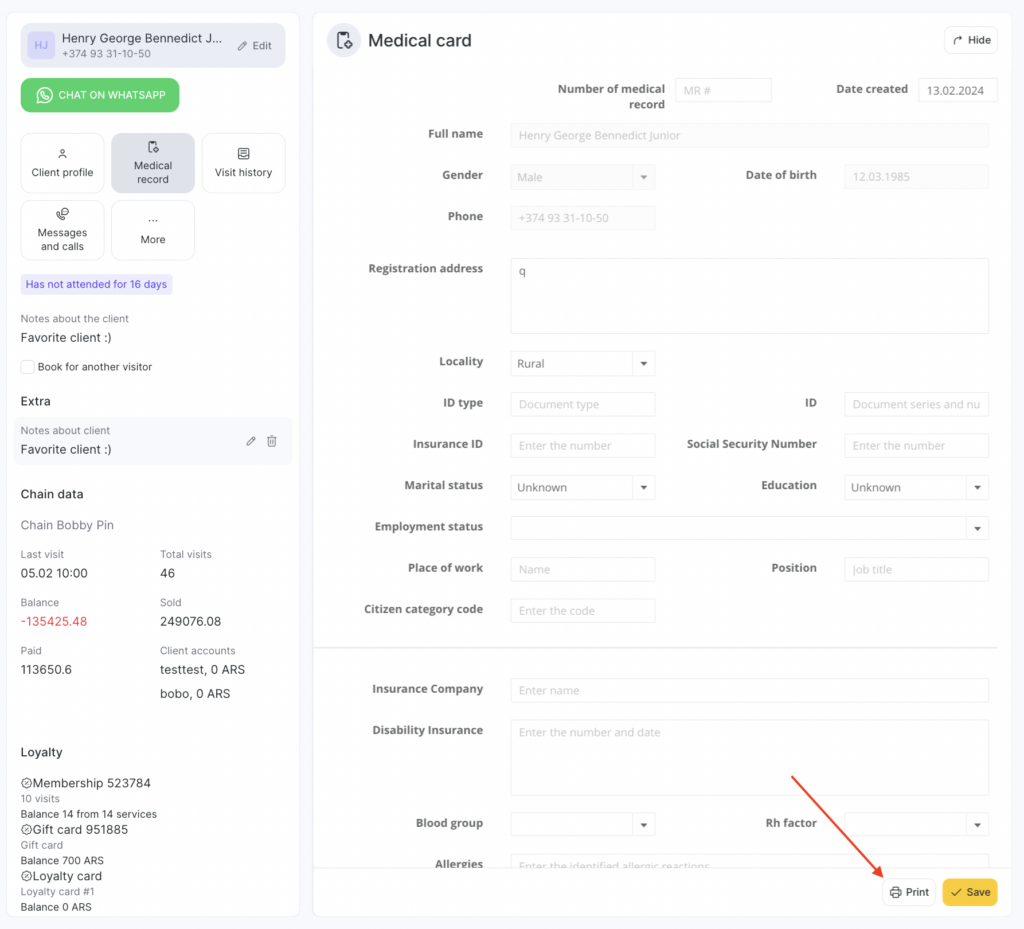
Working with the Medical Record #
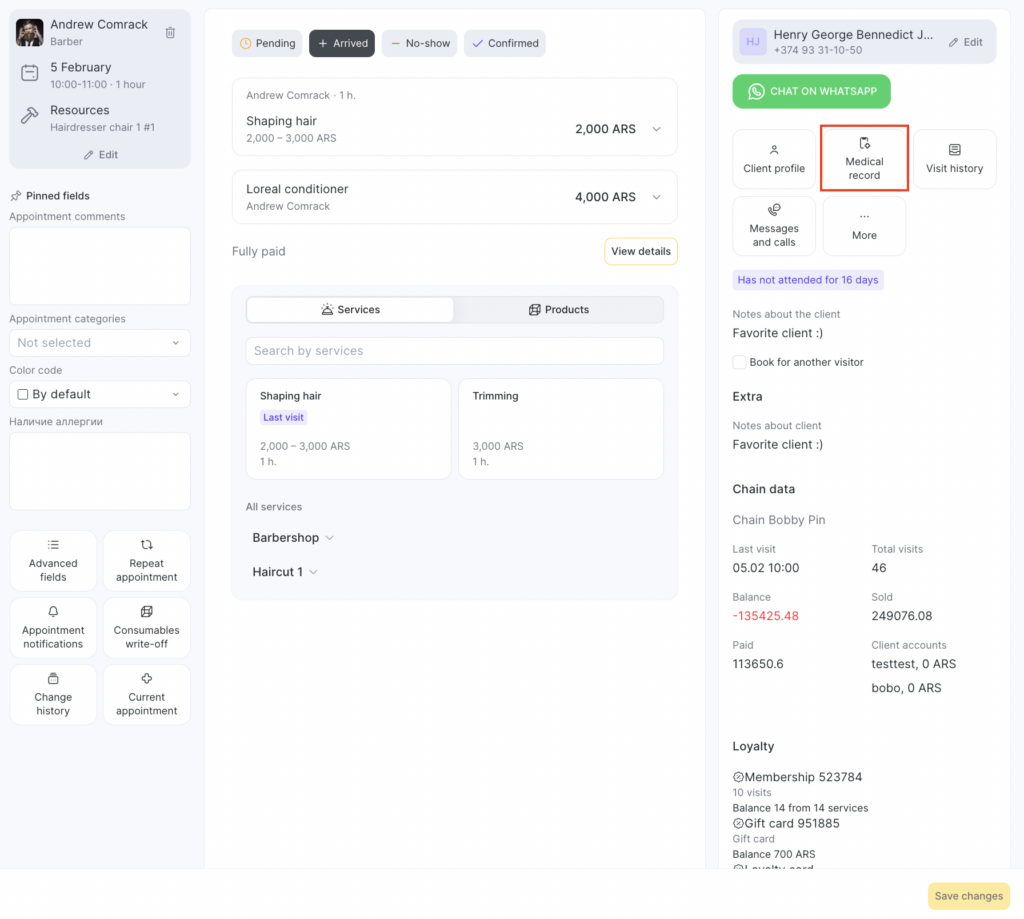
- Open the patient’s appointment in the Appointment Book and go to the Medical Record section. To do this, click More in the client actions panel if the section isn’t added to Favorites.
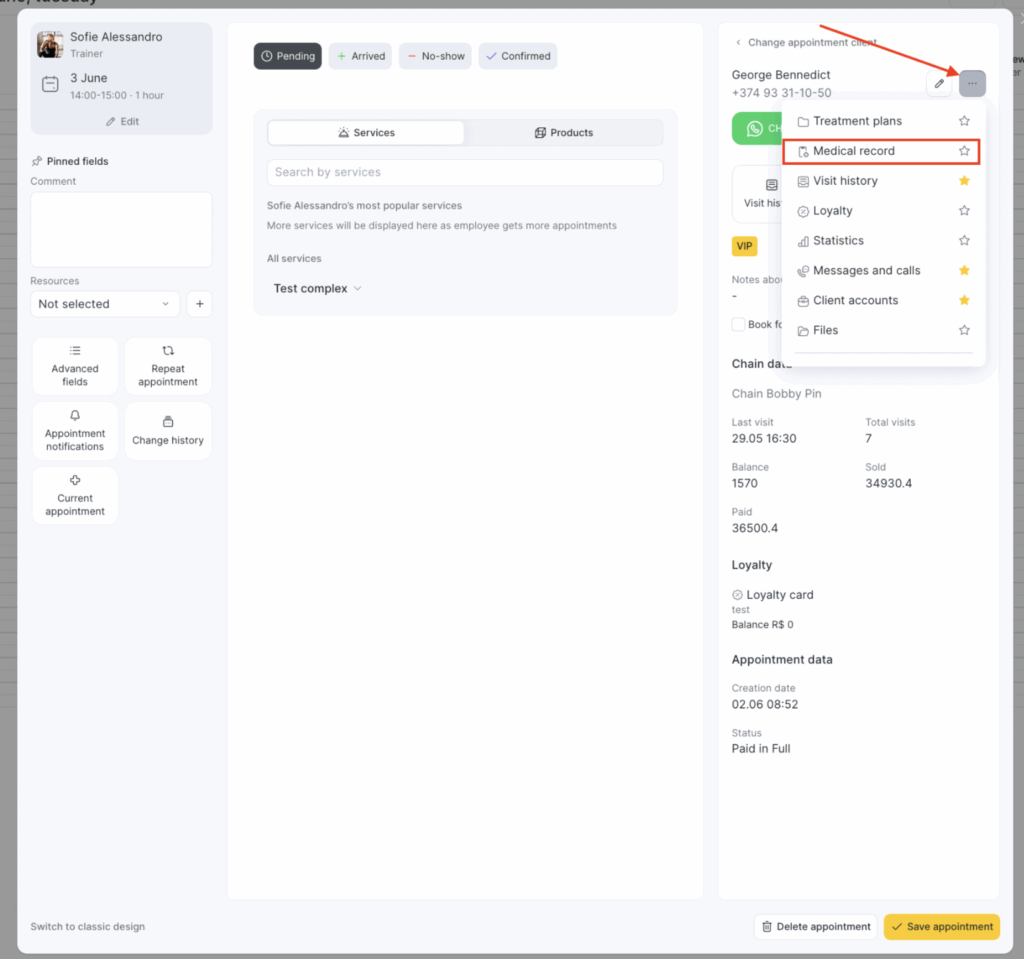
If you add this section to Favorites, it will be available right away without clicking the three dots.
Fill in the required fields. You can enter the following information in the medical record:
- Medical record number
- Date of completion
- Client name, gender, date of birth, phone number (auto-filled from the client profile section)
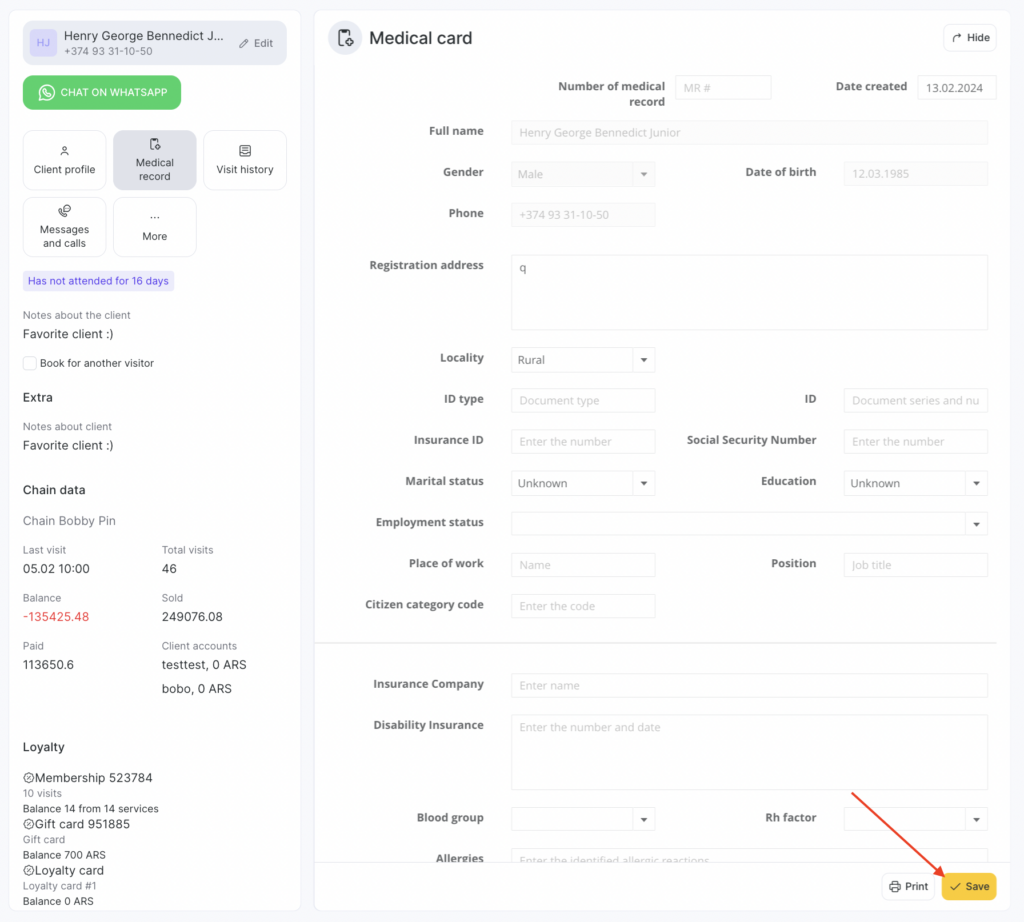
- Registration address
- Area type (rural, urban)
- ID document: series and number
- Mandatory health insurance policy (OMS)
- SNILS
- Marital status (registered marriage, not married, unknown)
- Education (professional: higher, secondary vocational, general secondary, basic, primary, unknown)
- Employment status
- Workplace, job title
- Beneficiary category code
- Insurance company
- Disability status
- Blood type, Rh factor, Ph
- Allergic reactions
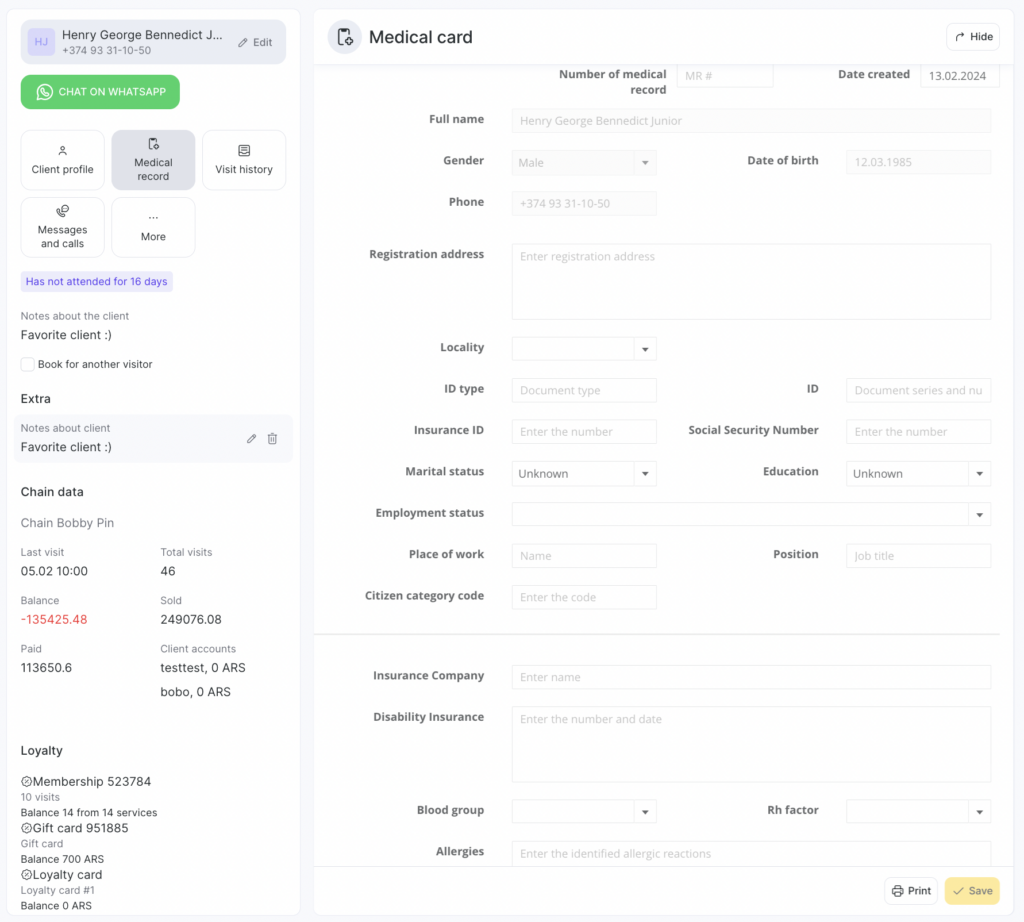
After filling in the form, click Save data. The completed medical record form will be saved within the patient’s visit.
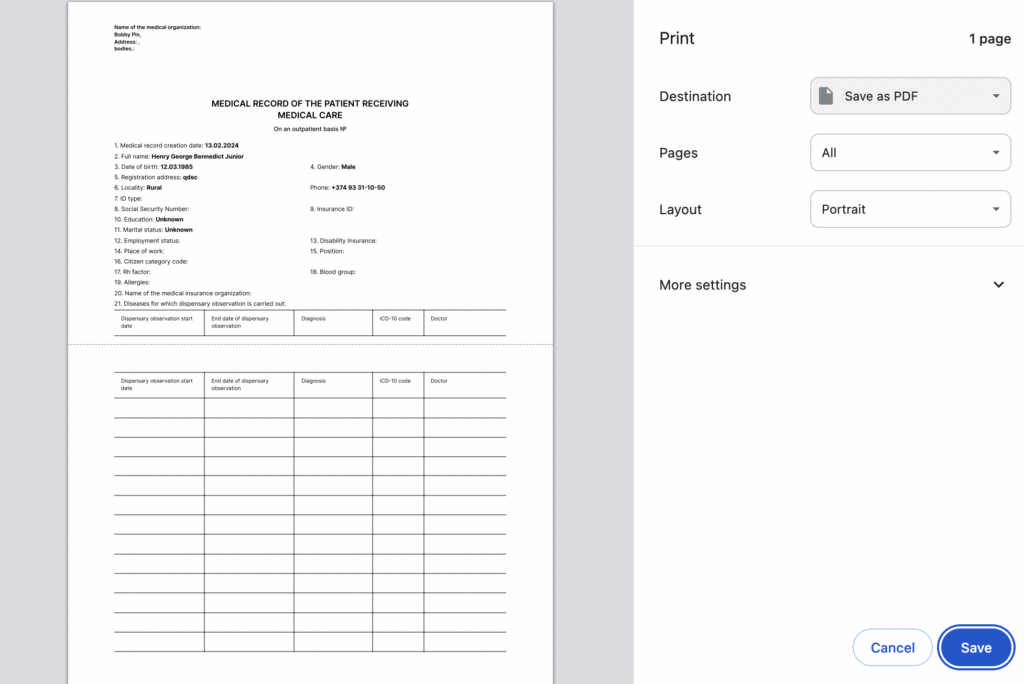
To print the medical record or save it to your device, click Print medical record.
On the page that opens, set your print options — then you can save the file as a PDF or send it directly to print.
You can view or edit a saved medical record only within the patient’s visit.
Access permissions #
To work with medical records, grant the required permissions to the team member:
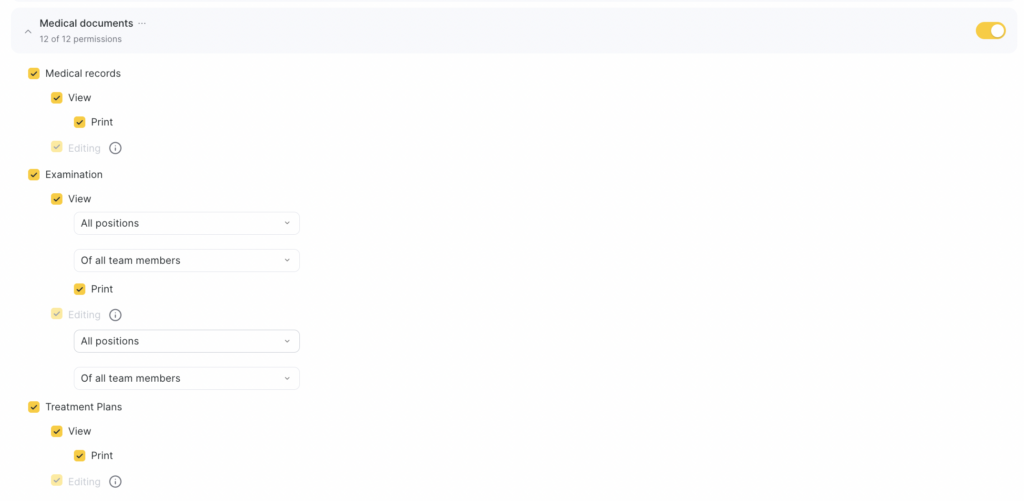
- Go to Team > Team members list.
- Click the employee’s role in the Role column and open the Access tab.
- In Medical documents, enable Medical records > View. Also enable additional permissions for printing and editing if needed.
- Click Save at the bottom.

