
In the Reports > Appointments section, you can find information on all appointments made in Altegio to your company. This includes appointments from any source, created by any user with the right to create an appointment, with any status, including deleted ones.
This section provides information about which appointments were made and during what period, who created them (receptionist or client), the source of the online booking, assigned team member, booked service, client information, etc.
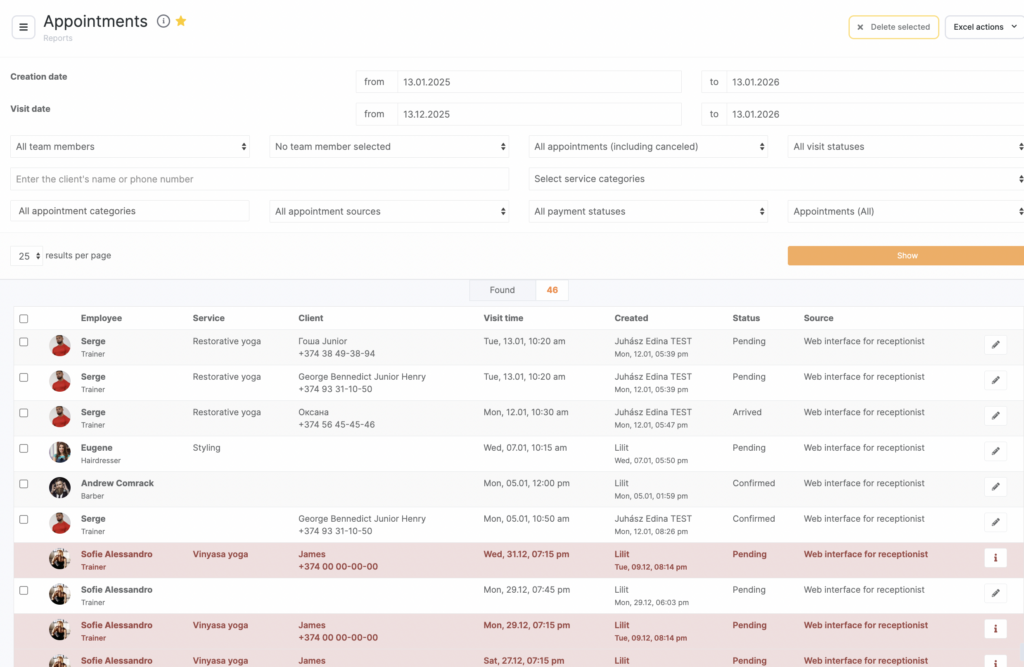
All appointment data can be viewed selectively using convenient filtering options:
Available filters:
- Creation date
- Visit date
- Team members
- Cancelled & non-cancelled / only cancelled / only non-cancelled appointments
- Visit statuses
- Client name/phone number
- Service category
- Appointment category
- All sources / online / offline (method of creation)
- All payment statuses / fully paid / not fully paid
- With or without services / with services / without services appointments
Apply the necessary filters and click the “Show” button. You can also search for appointments by a specific client by entering their name or phone number and clicking “Show.” Each appointment can be edited and/or deleted.
- To edit appointment click the Edit (pencil) button. Afterwards the visit will be opened in the Appointment Calendar, where you can make some changes.
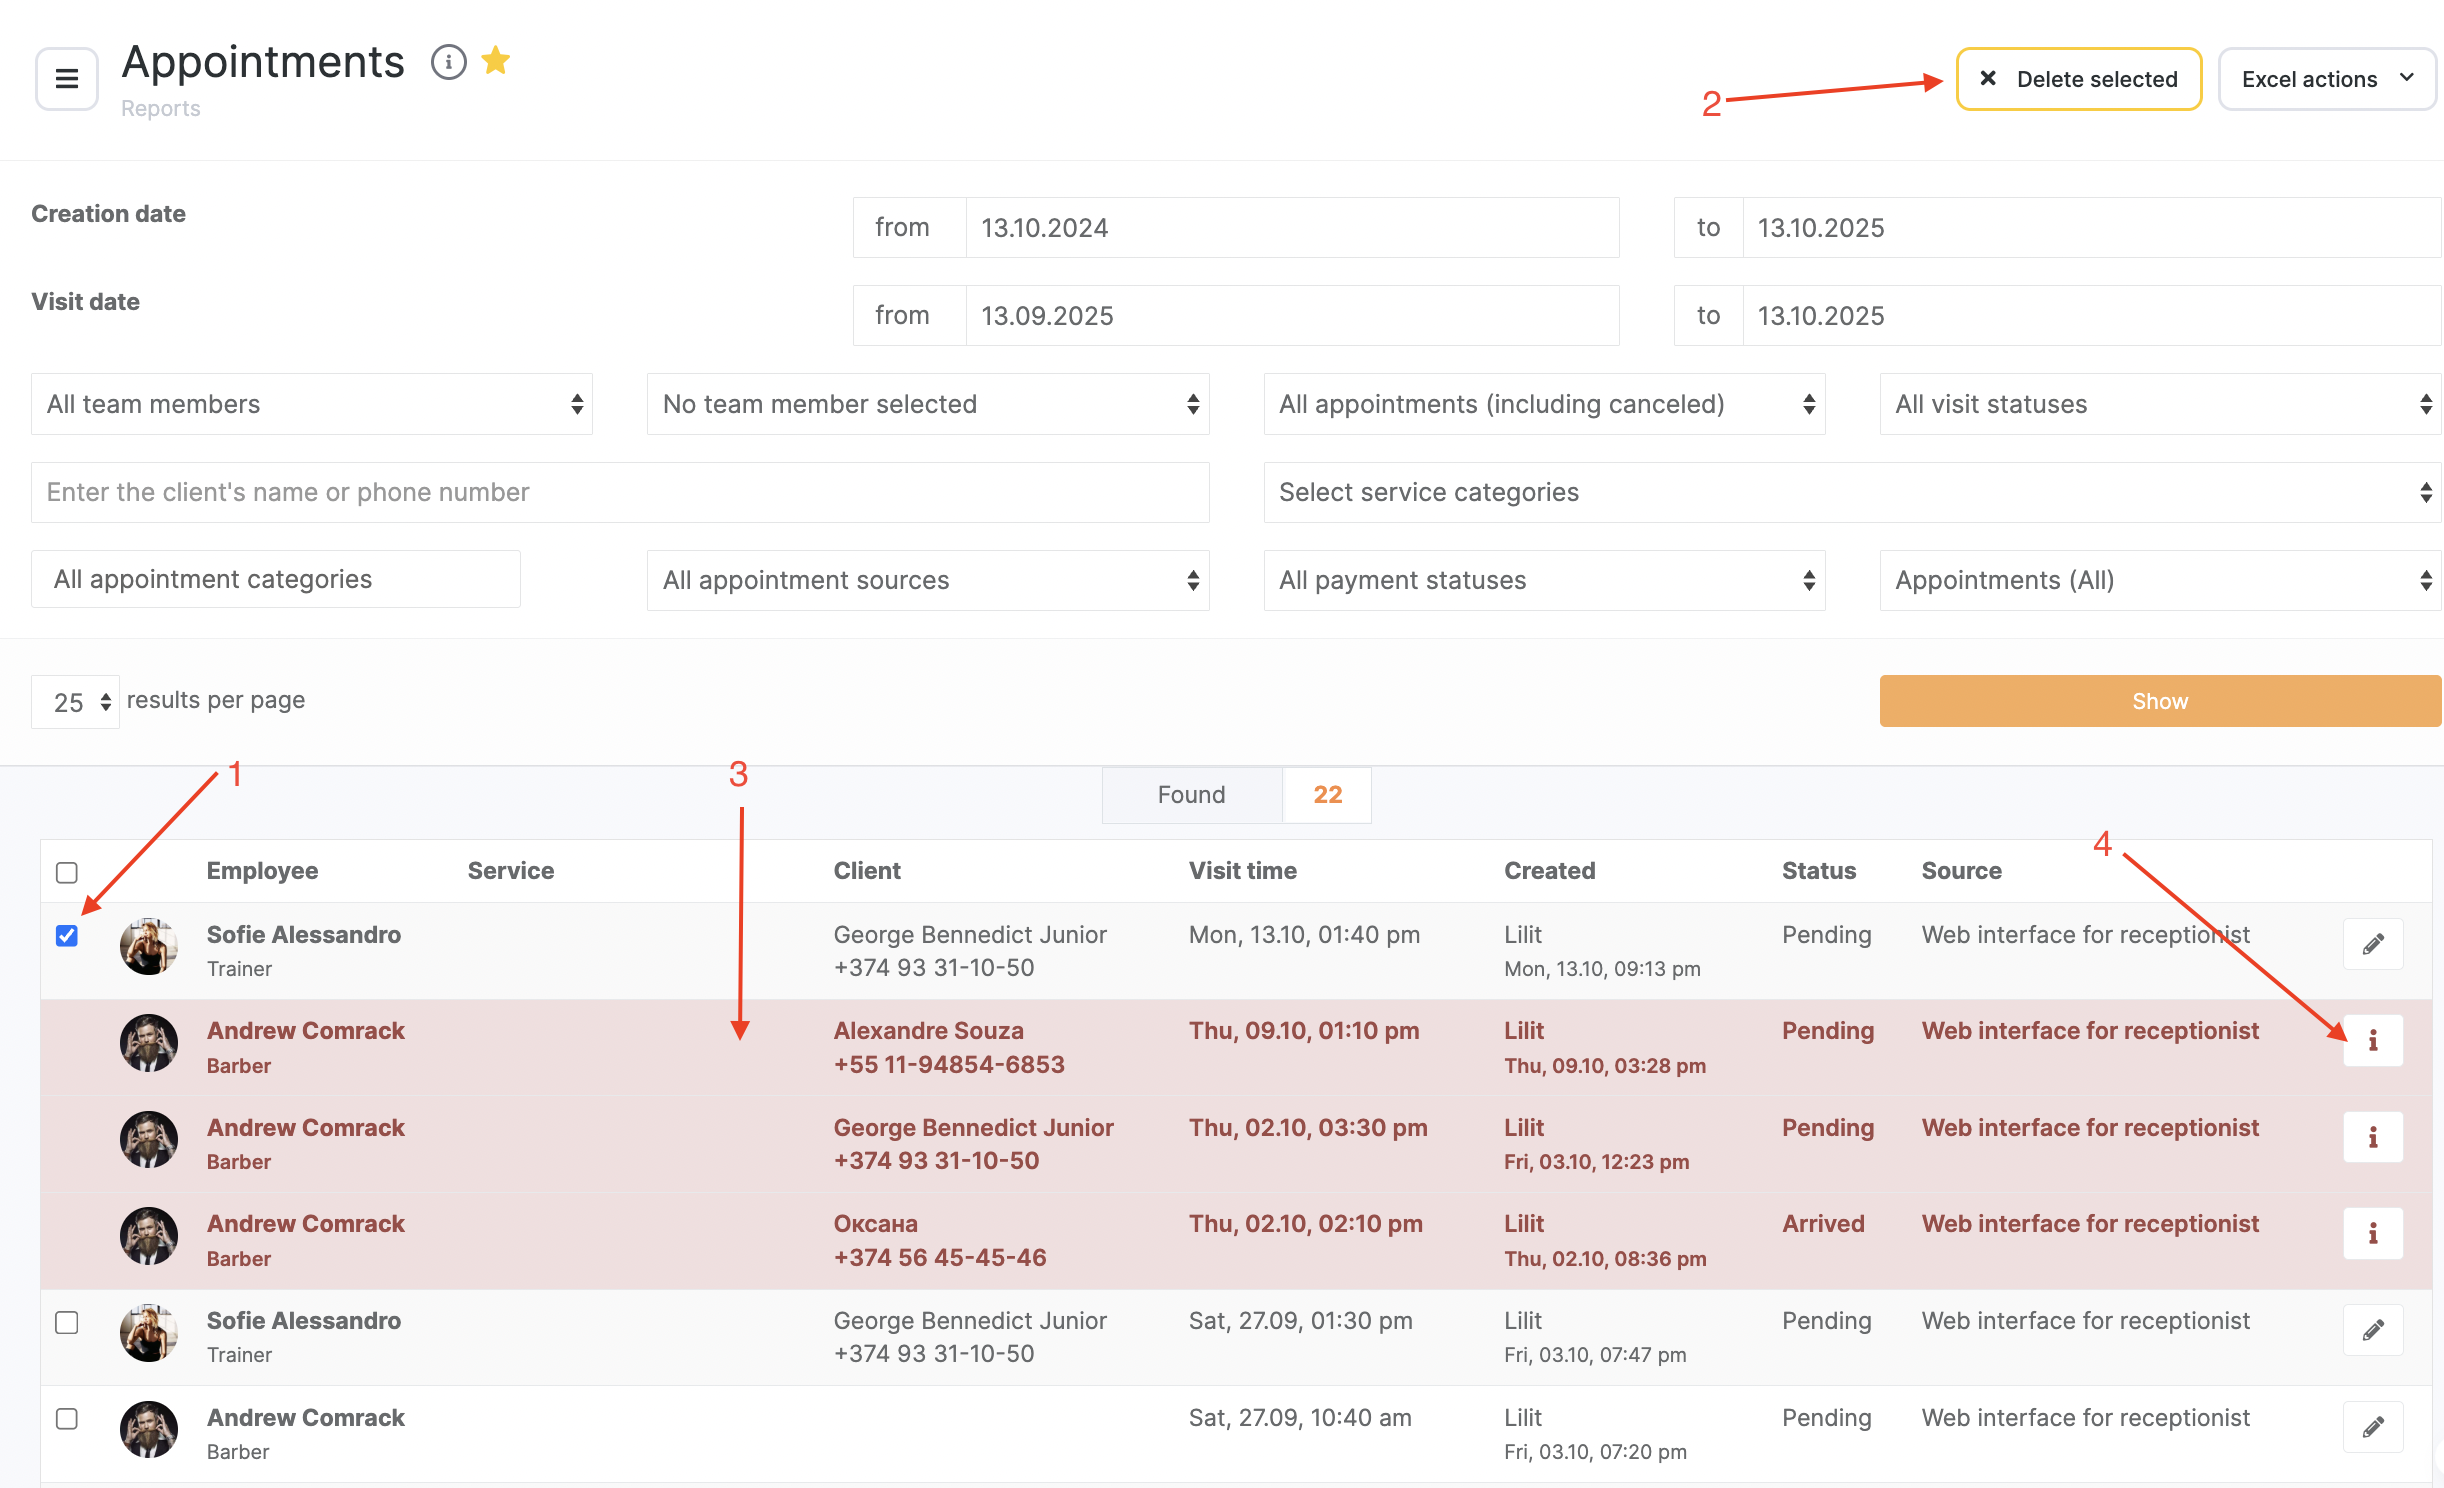
Appointments can be deleted one by one or in bulk. For deleting check the required appointments (1), the Delete selected button will be active (2), click it. The appointments will be deleted from the appointment calendar, and the row with the appointment data will change color to red (3). To see the detailed information about the deleted appointment, click Info button (4).
Appointments can be deleted individually or in bulk. To delete:
- Check the desired appointments
- The “Delete selected” button will become active
- Click it — the appointments will be removed from the calendar and turn pink in the list
To view deleted appointment details, click the view information button
Notes:
Deleted appointments cannot be restored — only recreated.If a user doesn’t have permission to delete paid appointments or those marked as “Arrived,” such records won’t be deleted.
The user will be notified after clicking “Delete selected.”
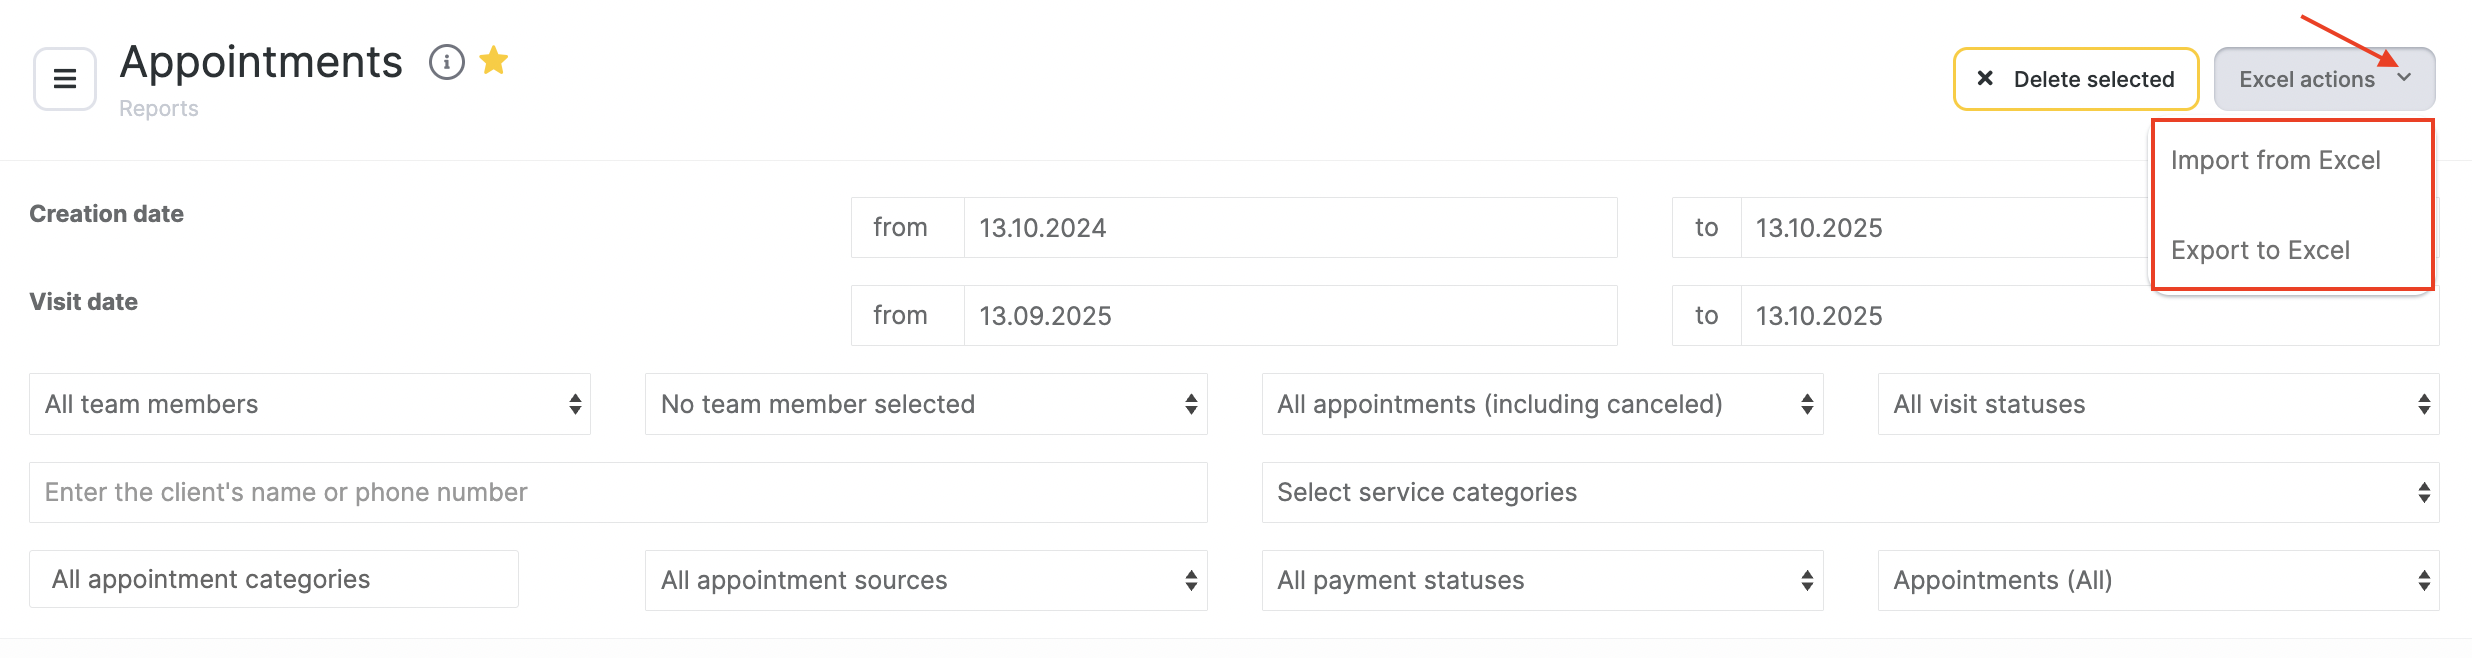
Excel actions #
You can export appointment data to Excel or import it from Excel.
Export to Excel #
Appointments are exported via email only. The user receives an email with a download link. Afterward, in Reports > Activity Logs a log will show who exported what data and when. If the user has access rights, they can also retrieve the file there.
Important
Limit per export from Reports > Appointments is 5,000 records.
Export file links from other users (employees with access) are hidden. Each user sees only their own downloads, regardless of their role or rights.
Import from Excel #
Imported appointments will appear both in Reports > Appointments and the Appointment Calendar.
To import appointments from Excel, ensure the following:
- User has full access rights to Altegio
- All services must be preloaded to the branch and not being edited during upload
- If the file includes sold product names, they must exist in the services section
- All staff must already be added to the branch (active or dismissed)
- Disable all notifications in Settings > System Settings > Notifications > Notification Types and disable WebHooks if used for integrations
- Set in Settings > Main Settings > Appointment Calendar the “Appointment preferences” to “Treat each booking as a separate visit”
- No need to create team work schedules or link services to team
- Only one file can be uploaded at a time
- File must contain no more than 5,000 rows. Split if needed
- Upload starts from the second row (first row is ignored)
- Go to Reports > Appointments, click “Excel actions”, then select “Import from Excel”
- Choose the file from your computer or drag & drop. After upload, click “Upload” (this won’t start the import yet)
- A mapping menu will appear. Match each column to the correct data type. Then click “Save” (this starts the import)
If clicking “Save” does not begin the upload, don’t click again. Contact technical support.
Excel File Requirements #
The file must contain:
- Date (format: 04.01.2022 10:30)
Time will be rounded based on Altegio’s step settings - Team member ID — How to find staff ID in Altegio
- Client phone number — format: 37493350369
- Client name — required. If left blank, it will be overwritten by the phone number in the database
- Team member name — must match the name in Settings > Main Settings > Team
- Duration — in seconds, multiple of 15 minutes. If blank, default is 15 minutes
- Service ID — How to find service ID in Altegio
- Service name — must match the name in Settings > Main Settings > Services
Note
Multiple services can be listed using ## between names, and commas or ## between IDs.
- Service price — if multiple services, each must have a price; if only total sum is known, use 0 for others with # separator
- Discount on service
- Comment — value of the “Comment” field
- Client phone number — required, in format 37493350369
- Client name — required
- Appointment status (number):
- No-show = -1
- Pending = 0
- Arrived = 1
- Confirmed = 2
- Appointment status (text):
- No-show
- Pending
- Arrived
- Confirmed
- Cash register ID — required for importing paid appointments
- Found via Finance > Accounts and Registers, open the register — the last digits of the URL are its ID
- Paid amount — required for paid records
- Must equal the sum of all services after discounts
- Single number, no split by services
- Only for records marked as “Arrived” and with funds received in one register


