
There are 2 types of spaces in Altegio: branches and chains.
Branches are highlighted in yellow on the left, and chains are highlighted in purple on the left. Branches and chains contain different sections.
To switch to a chain, do the following: #
- Click the branch name in the upper-left corner.
- In the dropdown list, select the required chain.
Note
If your Chains section is empty, it means you are not added as a user in the chain and you need to be added. Only a user with full permissions can add a user to a chain. To add a user, go to Settings > Users (in the chain) and click Add user. The instructions for inviting users to a chain are in the article.
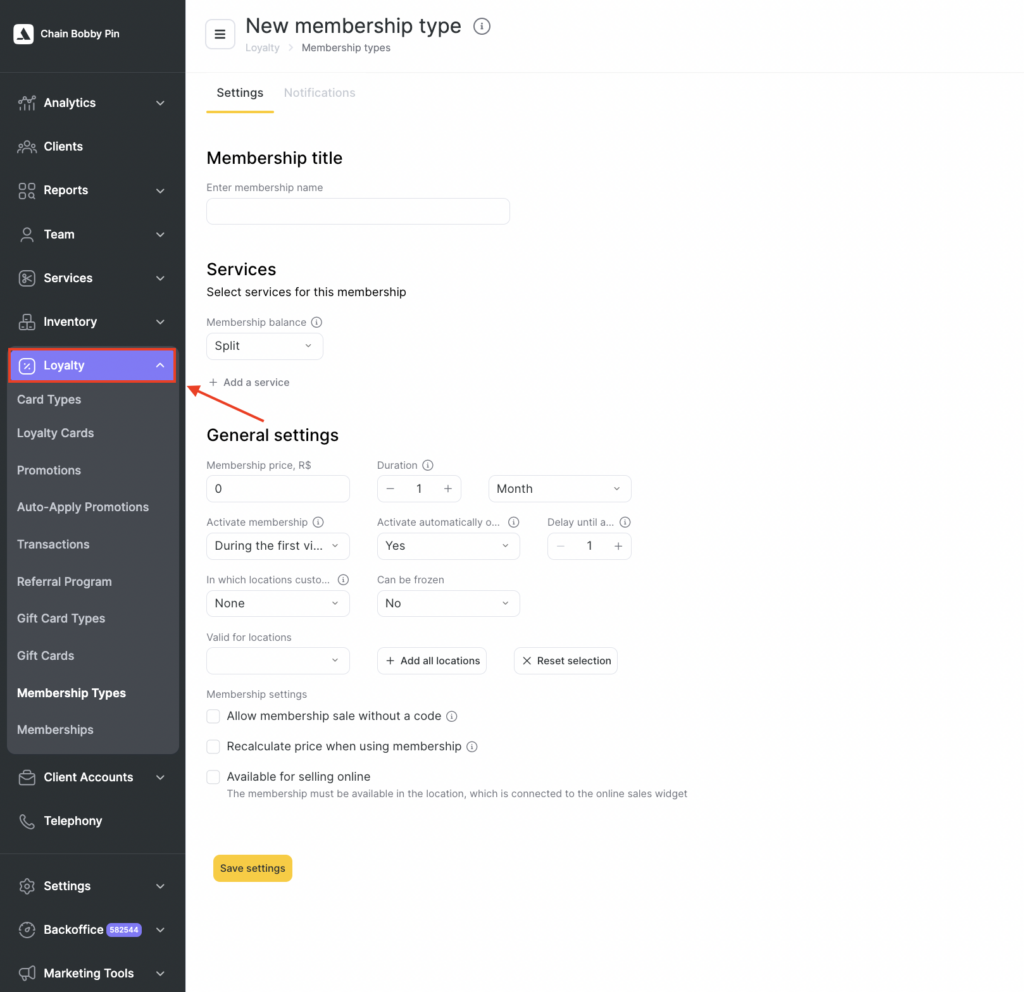
Creating a membership type #
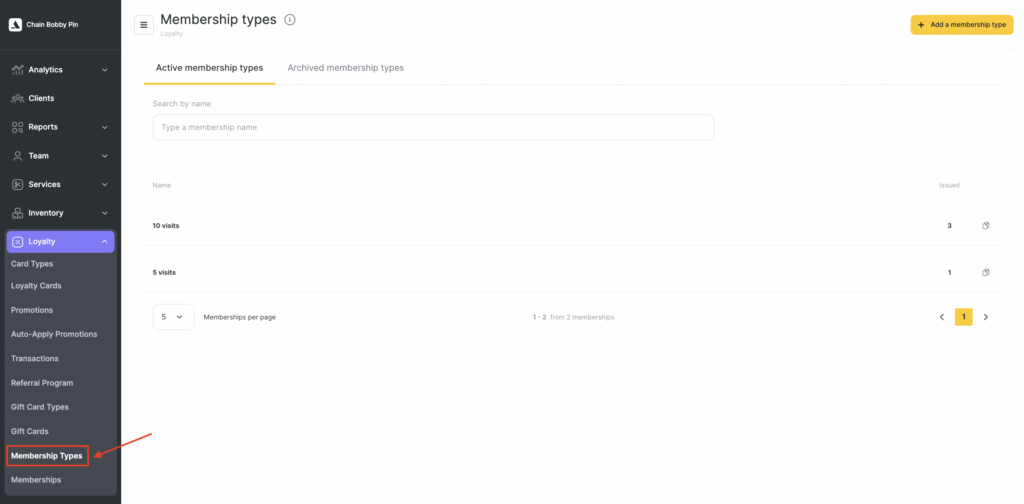
In the chain interface, go to Loyalty > Membership types.
- Click Add a membership type in the upper right corner.
- Enter the membership type name, for example, Massage membership.
- Select the services included in the membership.
In Altegio, you can create memberships:
- for a single service type, or
- with a shared number of visits across different services.
When creating a membership type:
- For a single service type, in the Membership balance dropdown select Split.
- For a shared number of visits across different services, select Overall.
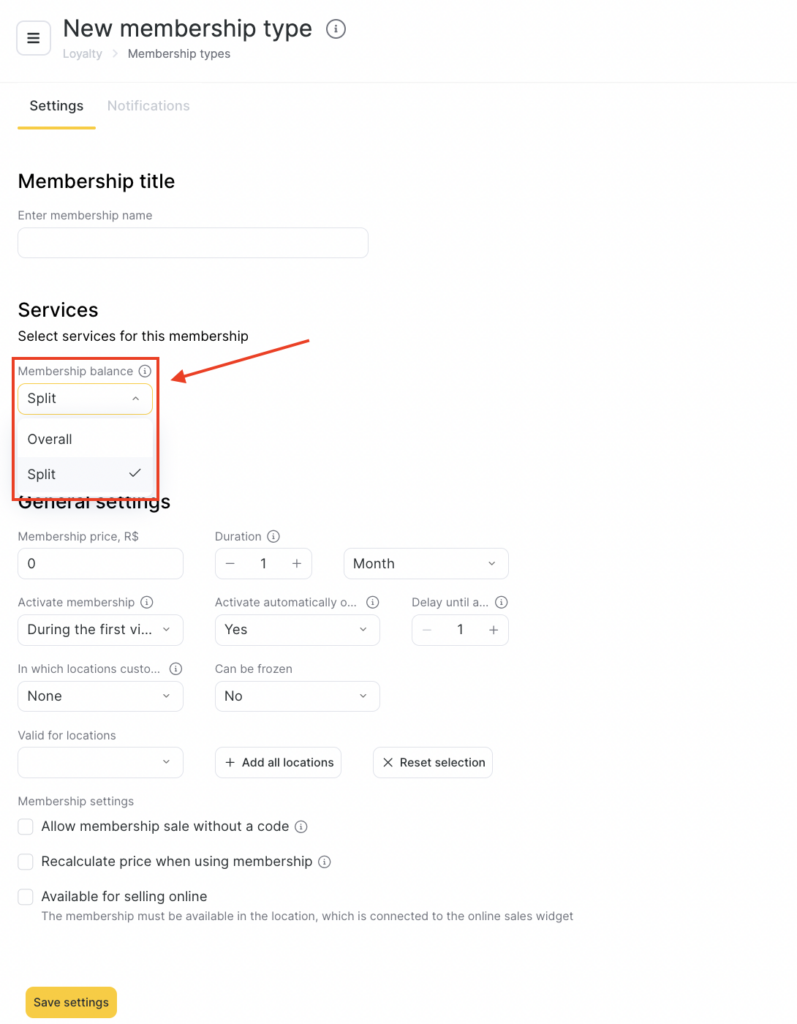
With an overall balance:
- one visit is deducted from the membership regardless of the service provided.
With a split balance:
- one visit for the specific service provided will be deducted from the membership.
- Specify the number of visits available in the membership balance.
Note
For a membership type with a shared balance, you can add new services after the membership has been sold.
For a membership type with a separate balance, you cannot add new services after the membership has been sold.
You cannot remove added services from a membership type with any balance after the membership has been sold.
- Select the service category and the service the membership will apply to.
- Specify the number of services included in the membership.
- To add services to the membership, click Add service.
General settings #
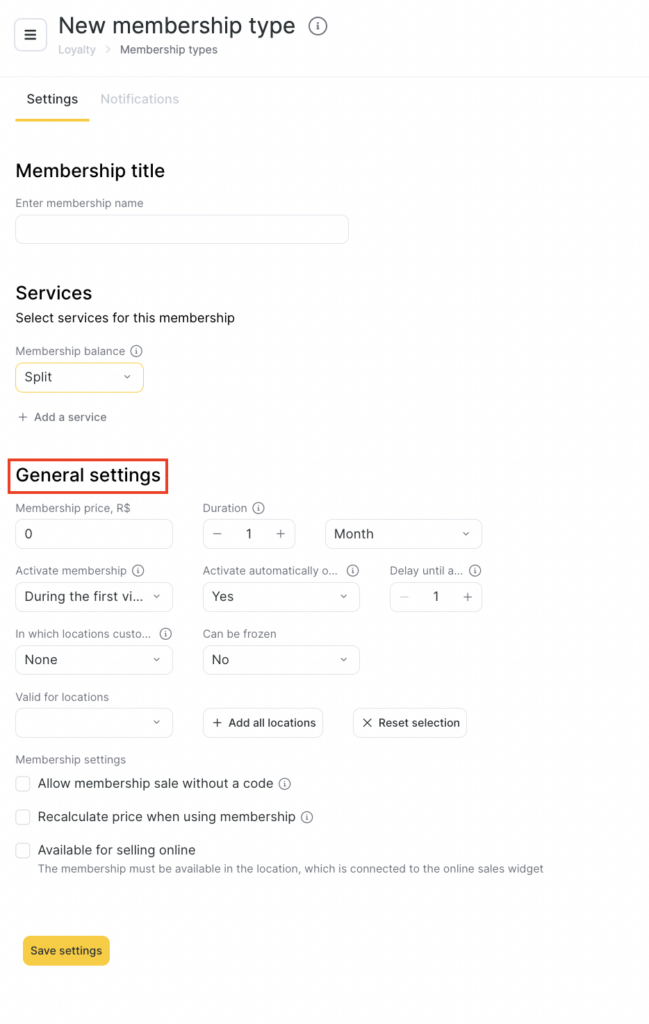
- Specify the membership price.
- Specify the validity period and the unit (day, month, week, year), and how the validity will be counted:
- from the first visit, or
- from the moment of sale.
- If you want the membership validity period to be unlimited, enter 0 in the Validity period field.
- If Activate membership automatically after a long absence is set to Yes, the field Activate from the moment of sale in will appear, where you can choose how long after the sale the membership will be activated. More details are in the article.
- Specify whether freezing the membership will be available.
- Enter any period for freezing the membership.
- More about freezing can be found in the article.
- Tick the checkbox if you want to allow selling a membership without a code.
- You will be able to create memberships that do not need a code assigned at sale.
- Such memberships can be used only if a client was specified at the time of sale.
Important
Always specify the client in the visit window when selling such memberships.
After the sale, a no-code membership will be linked to the client’s phone number of the person who purchased it; you won’t be able to apply the membership to a client with a different phone number.
You can recalculate the service cost depending on the membership price. As a rule, it turns out to be lower than in the price list, and this should be taken into account, for example, when calculating payroll.
How membership cost recalculation works: #
Cost from Membership type / Number of services in the membership = Service cost after recalculation
Example: 8000/10=800 (cost of one service)
- Allow or prohibit editing the membership.
- You can allow editing in all branches or only in the branch where it was sold.
- You can edit both the service balance and the membership validity period.
Important
You cannot change the list of services in the membership!
- Tick Availability for online sale if you plan to sell the membership online.
- Detailed instructions for setting up online sales can be found here.
- Select the locations where the membership will be valid.
- Click Save settings.
Using memberships #
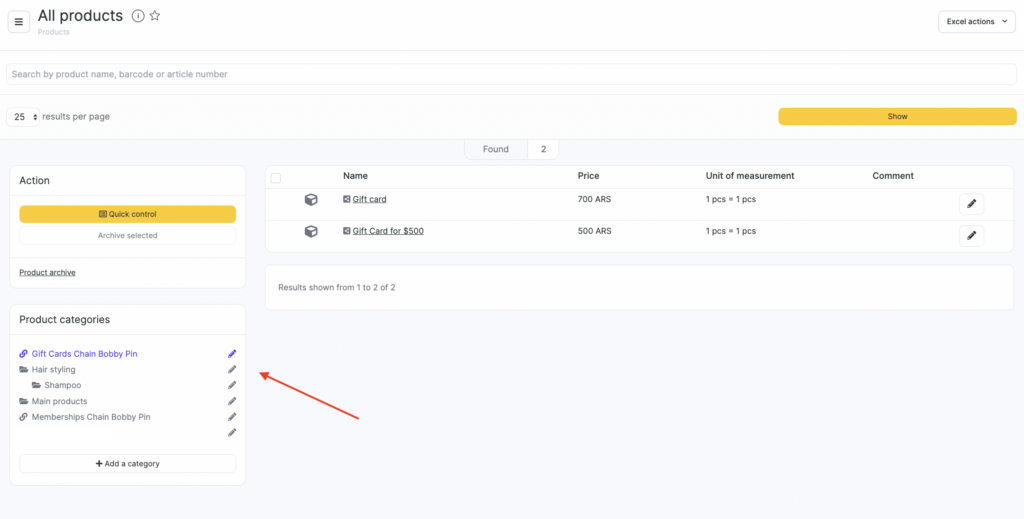
After you create them, memberships will appear in locations under Inventory > Products:
- the corresponding products will be created, and
- the Memberships product category will be created.
You will be able to sell memberships to clients (detailed instructions are in the article Membership sales), and sold memberships will be available as a payment method (Paying for services with a membership).
Important
If auto-activation is not enabled for the membership type, the timer selected in the settings starts from the moment you click Pay at the first use of the membership.
If a membership has already been sold, you cannot change the price in its type.
Duplicating a membership #
Sometimes you may need to:
- change the price in a membership type that has already been sold before, or
- create a new membership with the old parameters.
You can do this using the Duplicate membership button in the Membership types section in the chain interface.
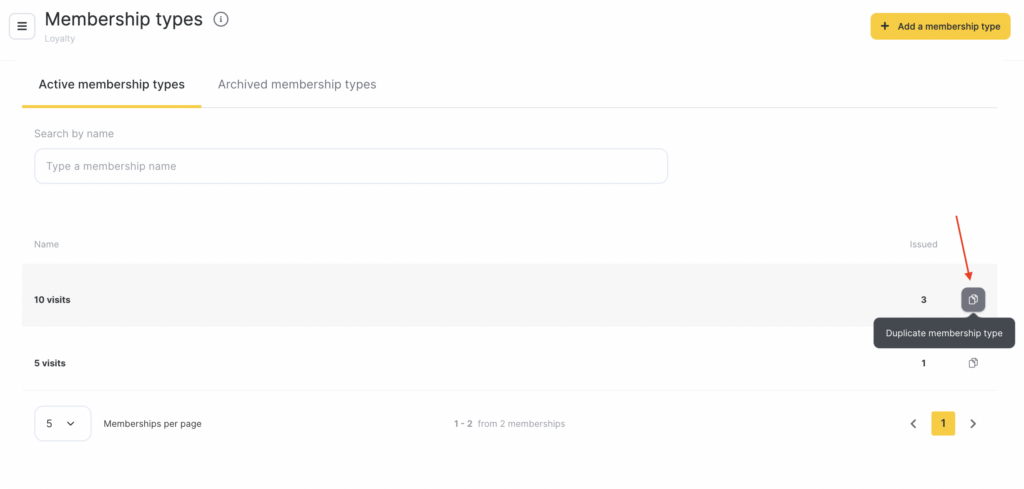
After that, the membership type will be copied and will appear on the page with (2) in the name.
To edit the membership, click its name.
Archiving a membership type #
To archive it, open an active membership type — the Archive button will appear in the lower-right corner.
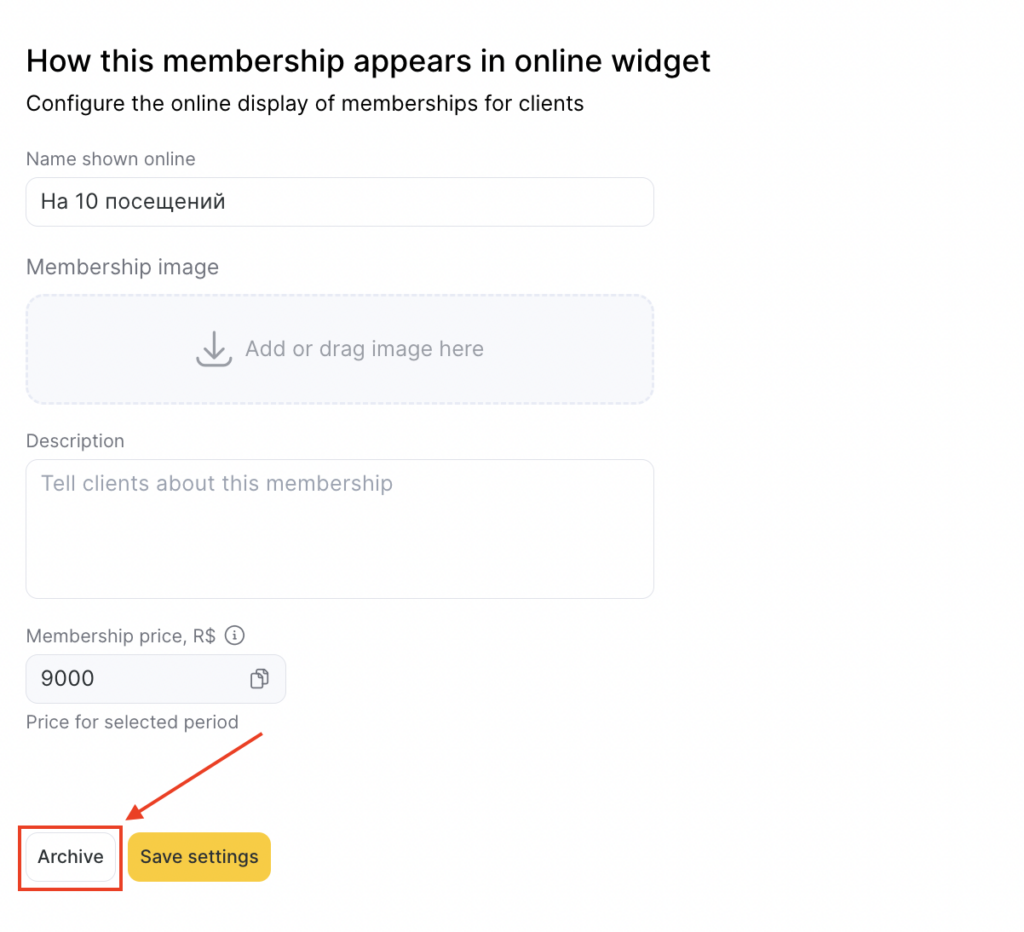
Archived membership types are moved to the Archived membership types tab. After moving, archived memberships stop appearing in the list of products during sale.
To restore a membership, go to the Archived membership types tab and click the action button to the right of the membership name.
Archived memberships are available for payment — you can use them to pay for services. More about archiving is in the article.
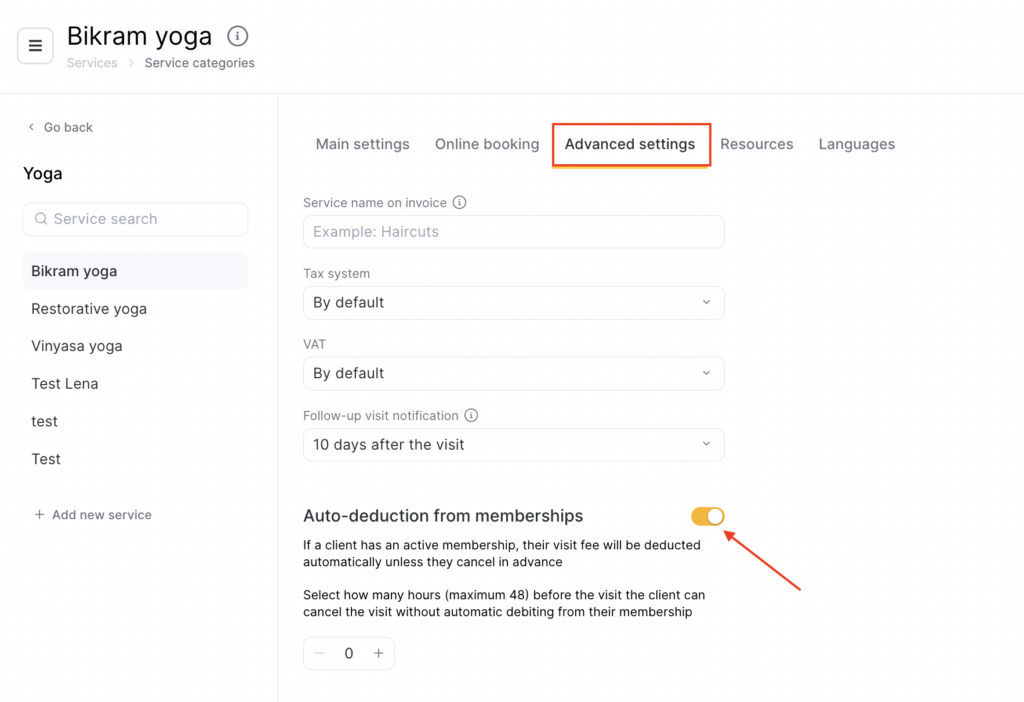
Automatic deduction from a membership #
In many businesses, a policy for canceling an appointment in advance is used. If the client did not cancel the appointment in advance, a visit will be deducted from their membership.
Automatic deduction is configured in the branch under Settings > Services. You can read more about this in the article.
Membership notifications #
If you have an SMS aggregator or a chatbot connected, you can also set up automatic notifications for clients:
- about membership expiration, and
- about deductions from the membership.
You can read more about setting up the integration in the article.
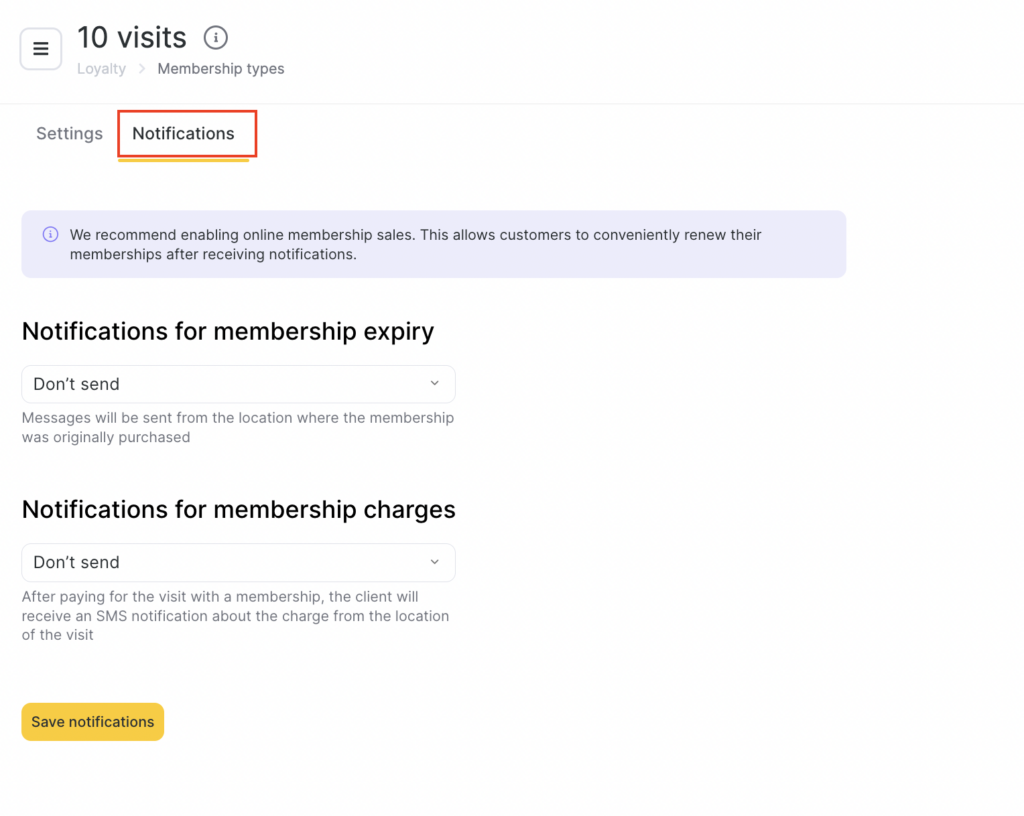
To set up notifications, go to Loyalty > Membership types in the chain interface, select the required membership type, and open the Notifications tab.
For more details on setting up notifications about membership validity and deductions from a membership, read the article.

