
Important
Loyalty programs are configured in the chain interface under the “Loyalty” section.
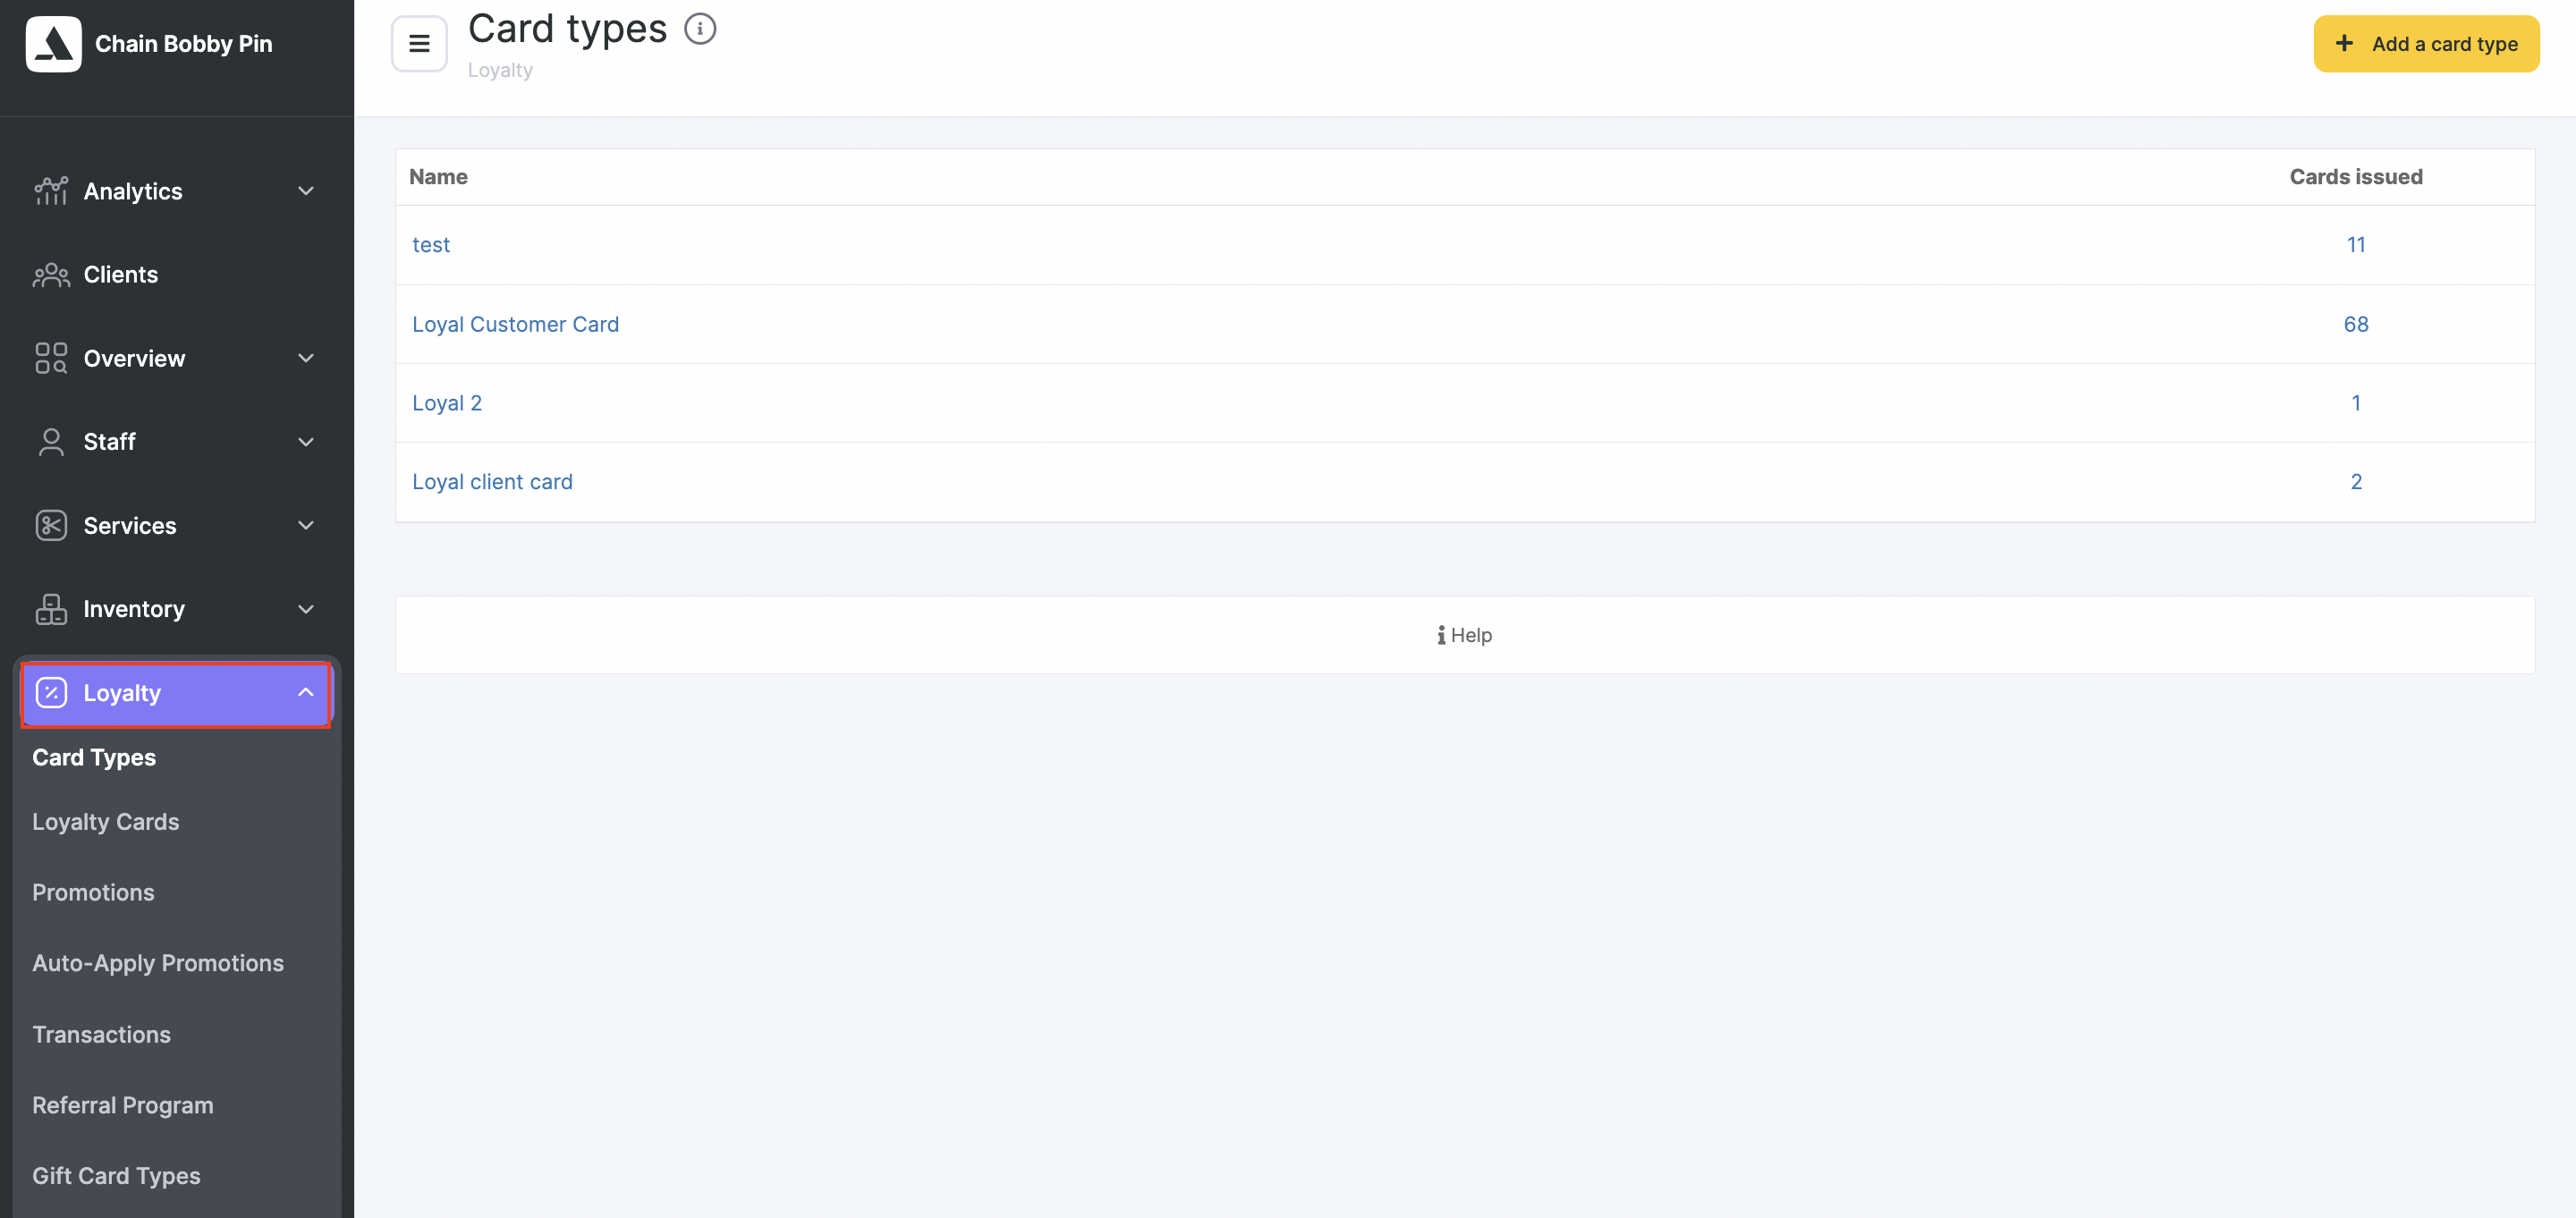
The Clients > Loyalty Program in the Location section appeared long before the chain version, so its functionality is limited and differs from the loyalty programs that can be set up in the chain. We recommend configuring loyalty in the chain interface.
In the Clients > Loyalty Program section, you can set up rules for automatically assigning personal discounts to clients, automatically adding them to categories, and assigning or removing importance levels.
Rules for Discounts
Altegio offers different types of discounts. You can configure promotional or referral discounts in the chain interface. You can also assign a personal discount to a client, which will appear in their client card and in the appointment window under the “Discount” field.
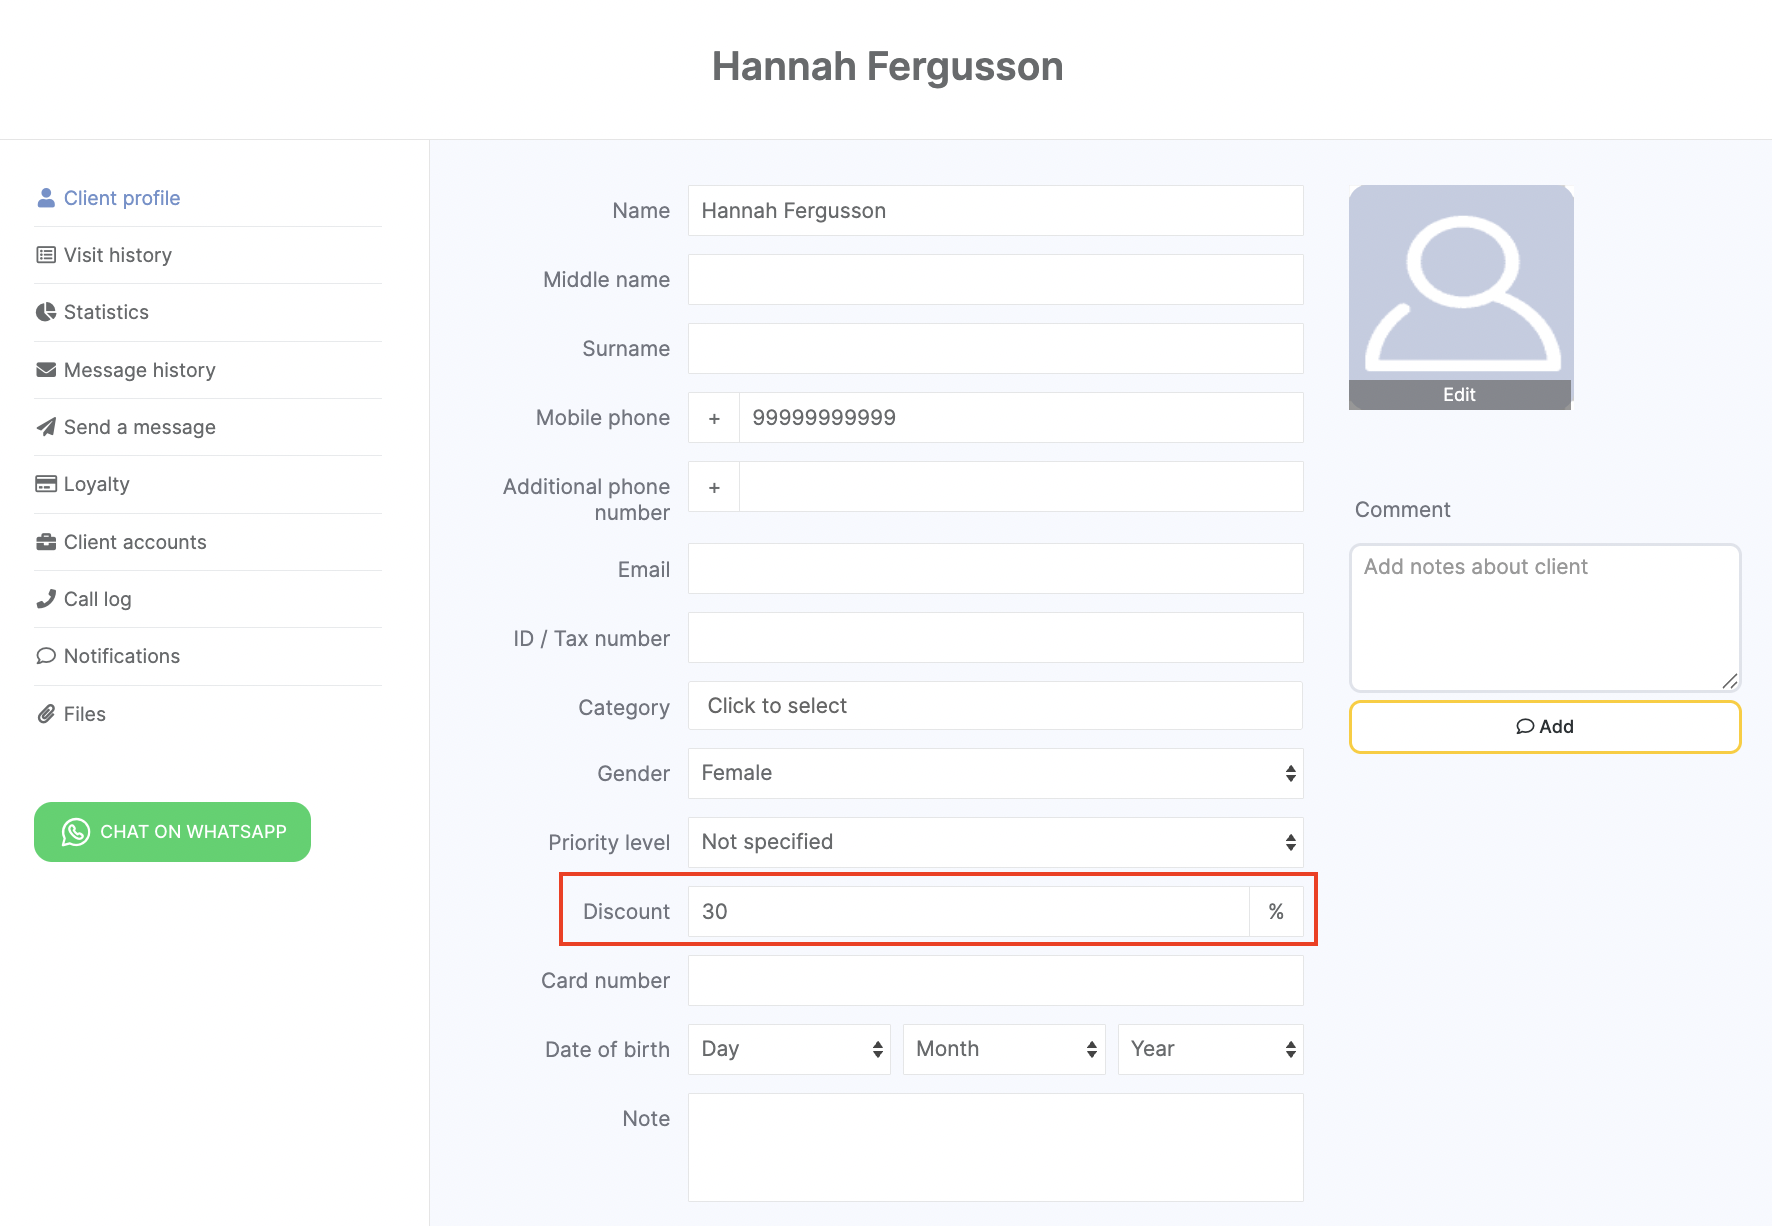
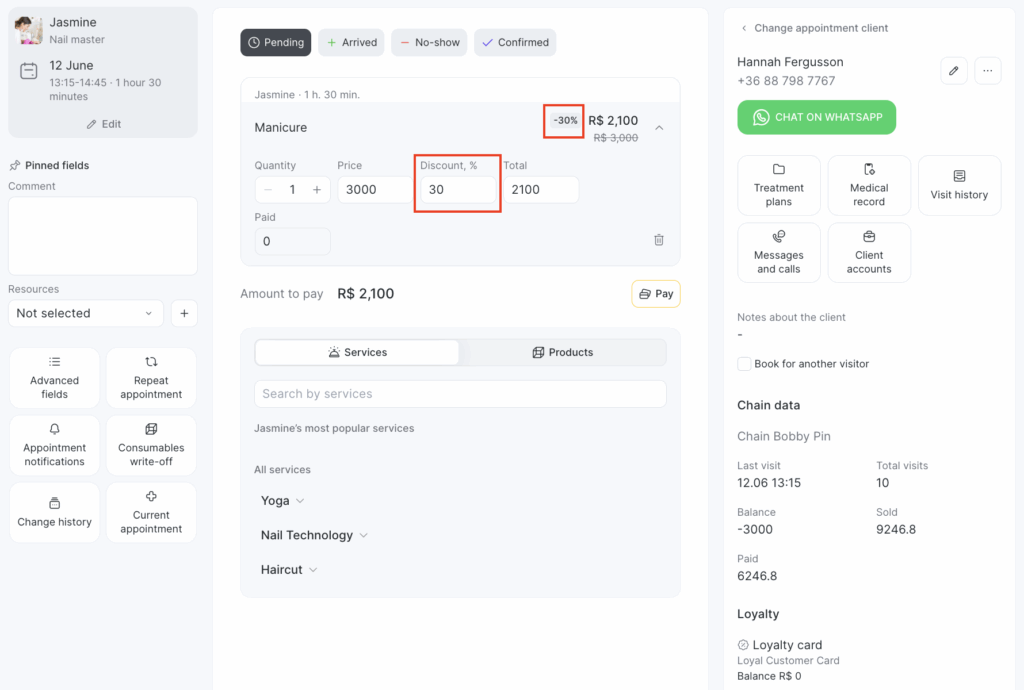
The personal discount is automatically applied during an appointment. You can view it under the “Visit status” tab (you can also edit or remove it there).
A personal discount can be assigned/removed manually in the client card, or you can configure automatic assignment/removal using the location’s loyalty program.
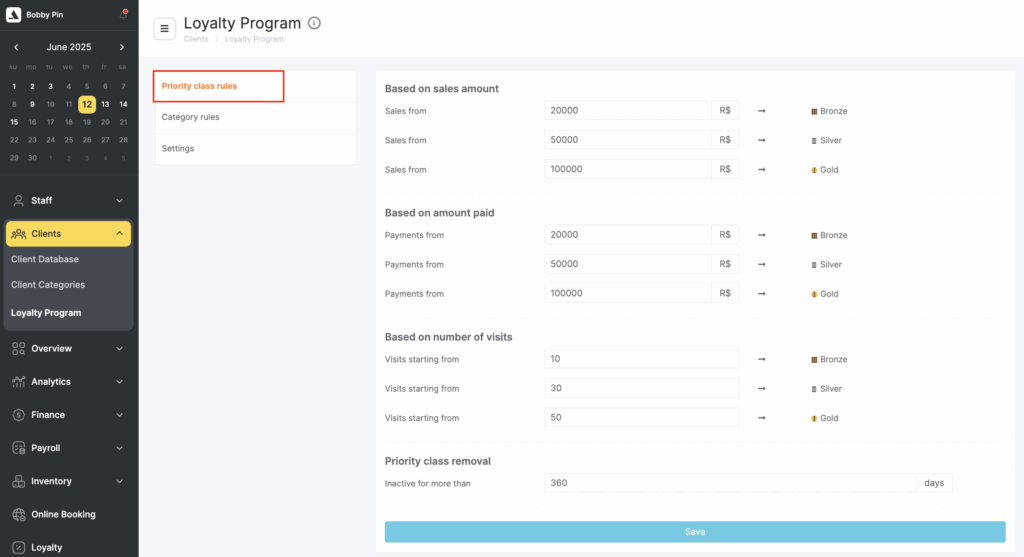
Once in Clients > Loyalty Program, the “Discount rules” tab opens. Rules are categorized by amount spent and number of visits.
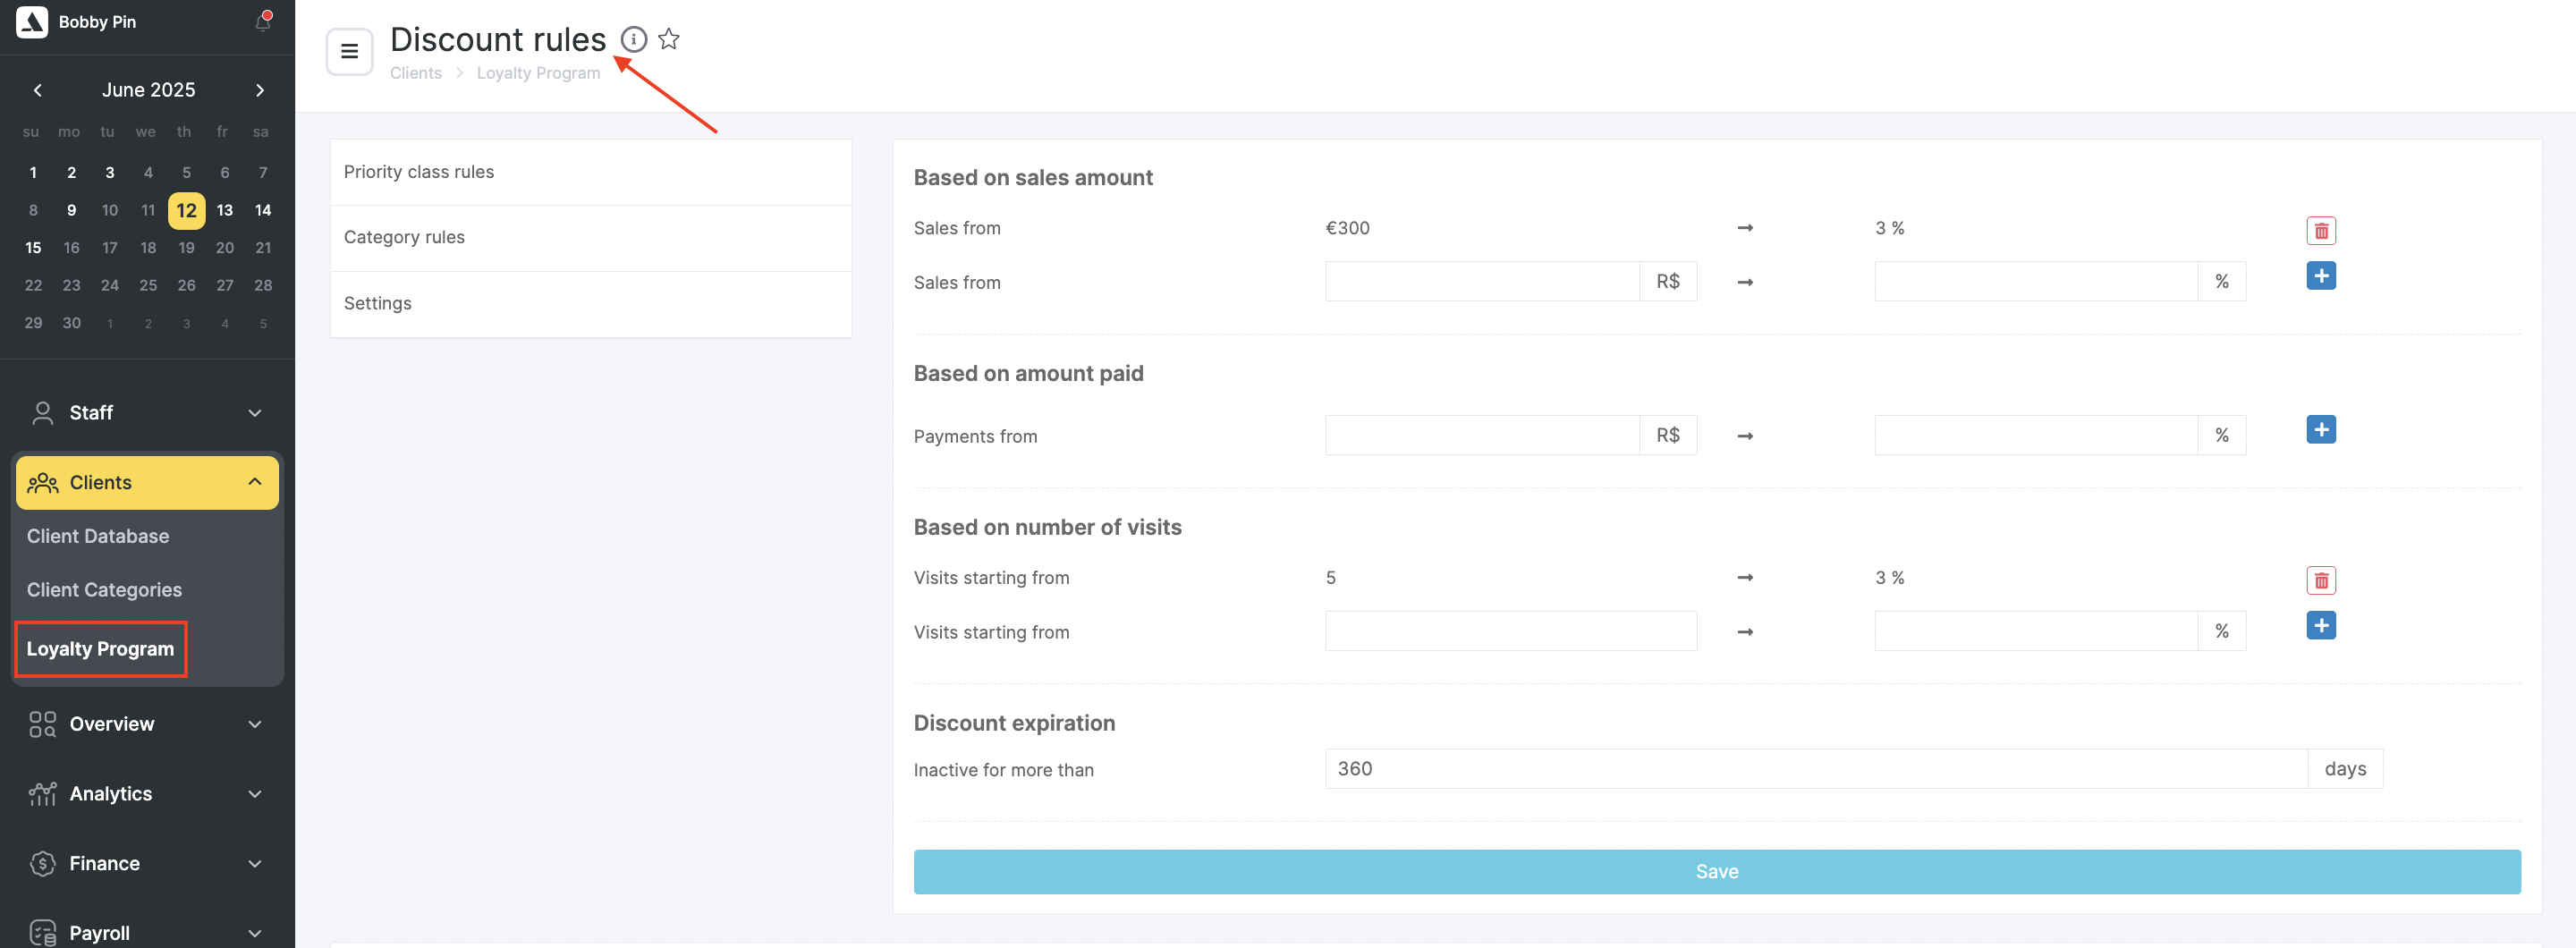
Based on sales amount – In the “Sales from” field, enter the amount spent by the client to qualify for a discount. The discount percentage is entered in the field to the right.
Example: Once invoices from visits or product sales reach $5,000, the client is automatically assigned a 5% personal discount.
Based on amount paid – In the “Payments from” field, enter the amount actually paid by the client to qualify for a discount. The discount percentage is entered in the field to the right.
Important
“Sales” and “Payments” values are different:
- Sales = the value of services and/or products invoiced
- Payments = the actual amount paid, which may be full or partial
Based on number of visits – In the “Visits starting from” field, enter the number of visits required for the client to receive a discount. The discount percentage is entered in the field to the right.
Example: Once the client has completed more than two visits, they automatically receive a 5% discount.
- Discount Cancellation – In the “Inactive for more than” field, enter the number of days without a visit after which the discount will be automatically removed.
Example: If the client hasn’t visited in 60 days, their discount is automatically reset to 0%.
You can create and delete multiple discount rules. To add a new rule, enter values in the relevant fields and click the “+” button. To delete a rule, click the trash icon next to it.
After setting everything up, click the “Save” button.
Rules for Priority Class #
In the “Rules for Importance Levels” tab, you can set up rules for automatically assigning importance levels to clients (“Bronze,” “Silver,” “Gold”):
- Based on sales amount – For each level, enter the amount spent by the client in the “Sales from” field to receive that class.
- Based on amount paid – For each level, enter the amount paid by the client in the “Payments from” field to receive that class.
- Based on number of visits – For each level, enter the number of visits required in the “Visits starting from” field to assign that class. Example:
- Spend/pay 20,000 or make 10 visits → Bronze class
- Spend/pay 50,000 or make 30 visits → Silver class
- Spend/pay 100,000 or make 50 visits → Gold class
- Priority class removal – In the “Inactive for more than” field, specify the number of days without a visit after which the assigned class will be removed.
You can fill in any of the rules at your discretion. After making changes, click the “Save” button.
Rules for Categories #
In this tab, you can create rules for automatically assigning clients to categories.
- Automatic category assignment – In this section, you define rules for auto-adding clients to specific categories. You can create categories in Clients > Client Categories (see article for more info). For each rule, specify either the amount (“Sold from”/“Paid from”) or number of visits (“Visits starting from”) that will trigger category assignment. The category is selected from the dropdown menu. Example:
- Spend 2,000 → automatically assigned to “Economy”
- Pay 30,000 → automatically assigned to “VIP”
- 20+ visits → automatically assigned to “VIP”
Example: 90 days without a visit → automatically moved to “Lost” In the fields “Visit status set to ‘’Arrived’” and “Visit status set to ‘No-show’”, you can assign categories based on visit status. - Automatic category removal – This section allows creating rules for auto-removal from a category to ensure clients are in only one category at a time. Similar to above, specify amount (“Sales from”/“Pyments from”) or visit count (“Visits starting from”) for removal. The category is selected from the dropdown. Example:
- Spend 10,000 → automatically removed from “Economy”
(since “Standard” rule already exists for the same amount)
- Spend 10,000 → automatically removed from “Economy”
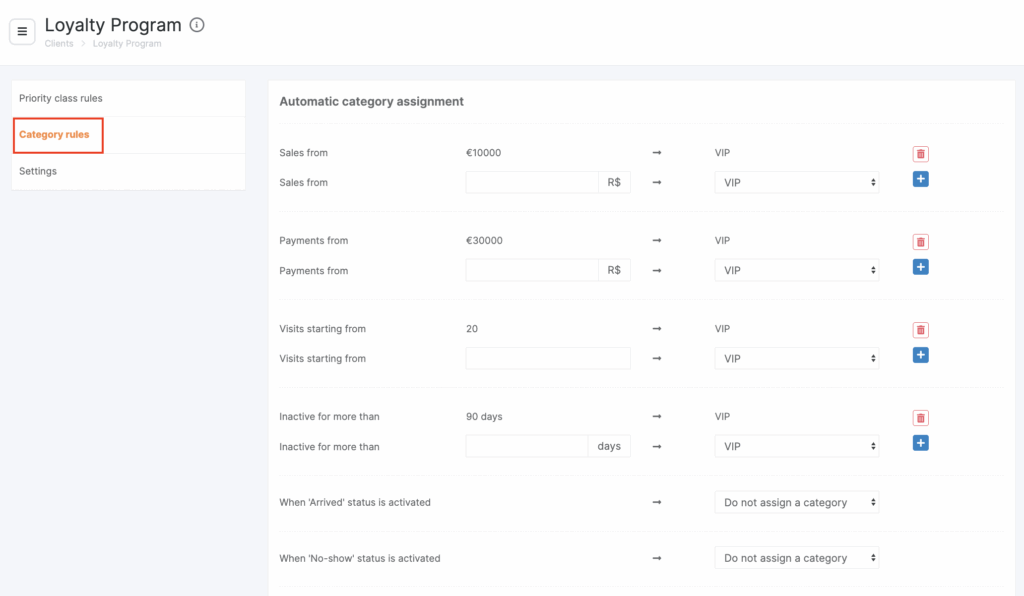
You can create and delete different rules for both auto-adding and auto-removing from categories. To add a rule, fill in the fields and click “+”. To delete, click the trash icon.
After configuring, click the “Save” button.
Settings #
This tab allows enabling SMS notifications for discount expiration configured in Clients > Loyalty Program. Notifications for other loyalty programs are configured in the chain.
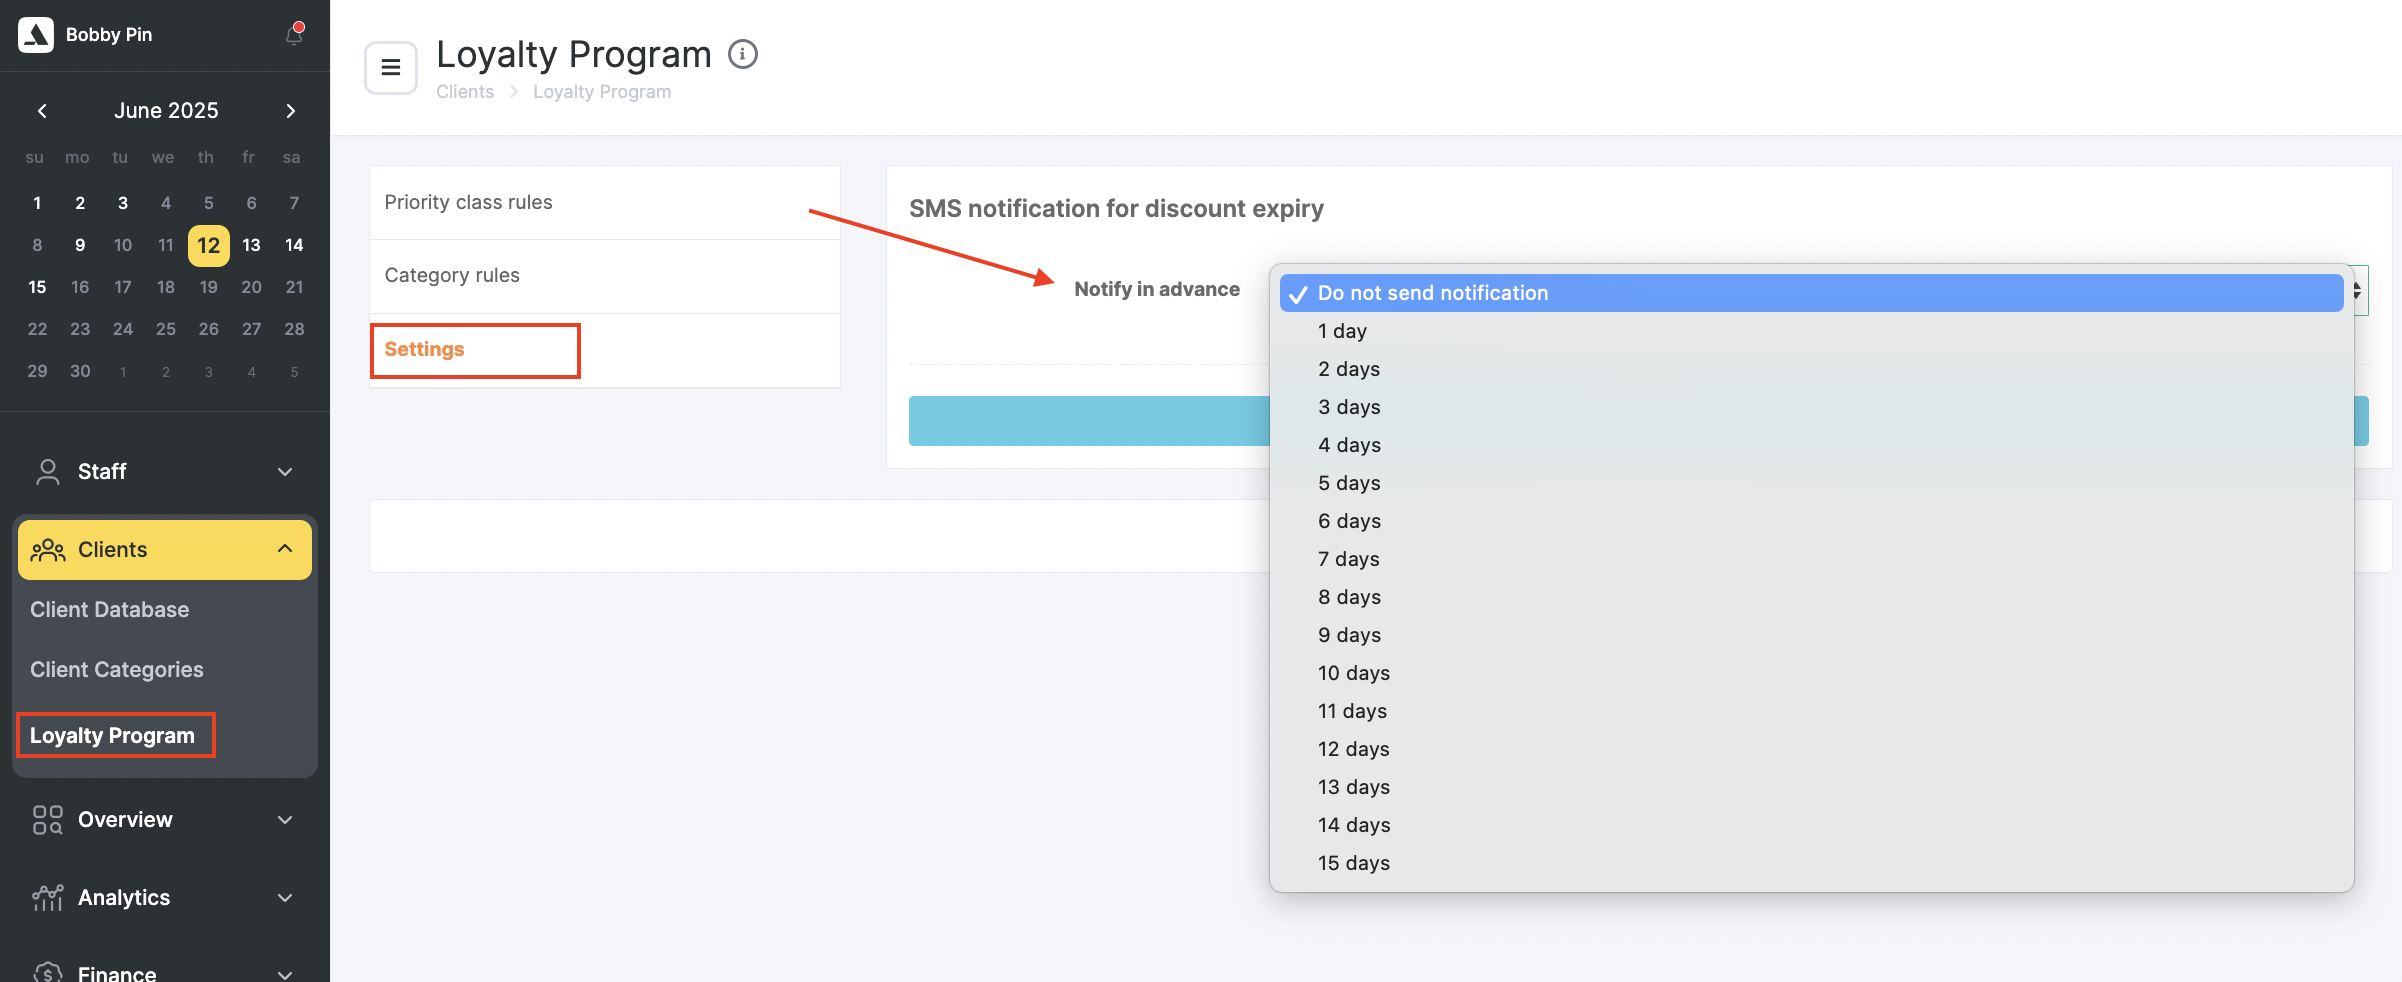
You can configure or disable the SMS template in Settings > System Settings > Notifications under the “Notification Types” tab. You can also change the sending time here — it will then be updated in Clients > Loyalty Program, and vice versa.
Important #
Updating discounts, categories, and importance levels based on spending and number of visits occurs:
- Automatically when saving a record with the “Arrived” status
- Automatically when saving a loyalty program in Clients > Loyalty Program
- Manually in the client card in Clients > Client Database
If a client qualifies for different discounts based on multiple criteria, the higher discount is applied.
If a client qualifies for different importance levels, the one with higher priority is applied (“Gold” > “Silver” > “Bronze”).
If a client qualifies for different categories by “Sold,” “Paid,” and “Number of visits,” they will be assigned all applicable categories.
Category removal rules should not contradict the logic of category assignment.


